
【U.S. Short-Term SIM Plan (eSIM Version)】How to Add an eSIM
Once your service start date (U.S. time) arrives, add the eSIM to the smartphone you will be using.
※You cannot set up the eSIM before your service start date.
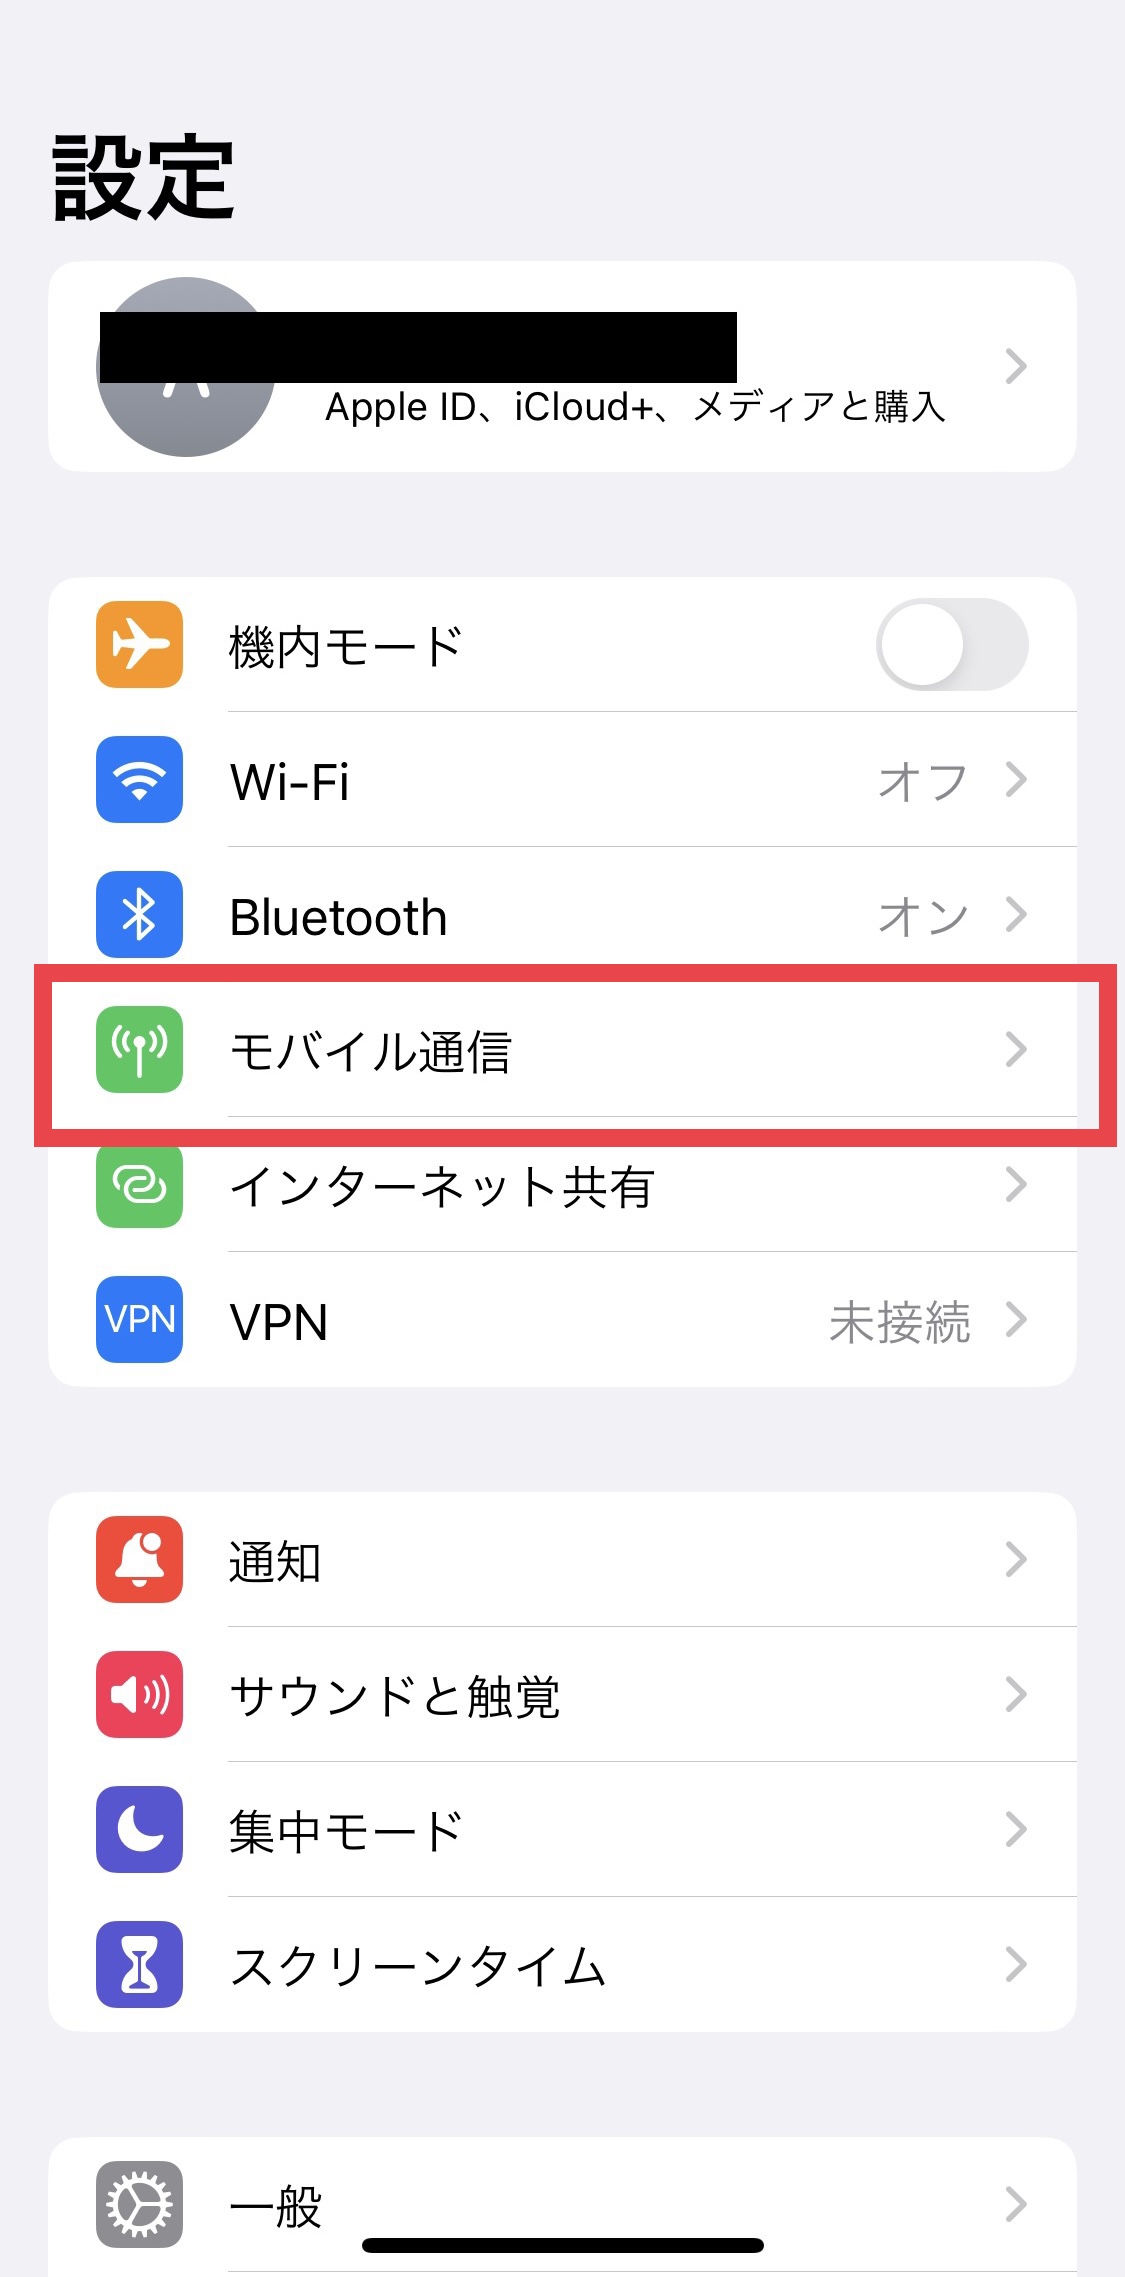
① Connect to Wi-Fi, then tap [Settings] → [Cellular].
※Please make sure Airplane Mode is turned off.
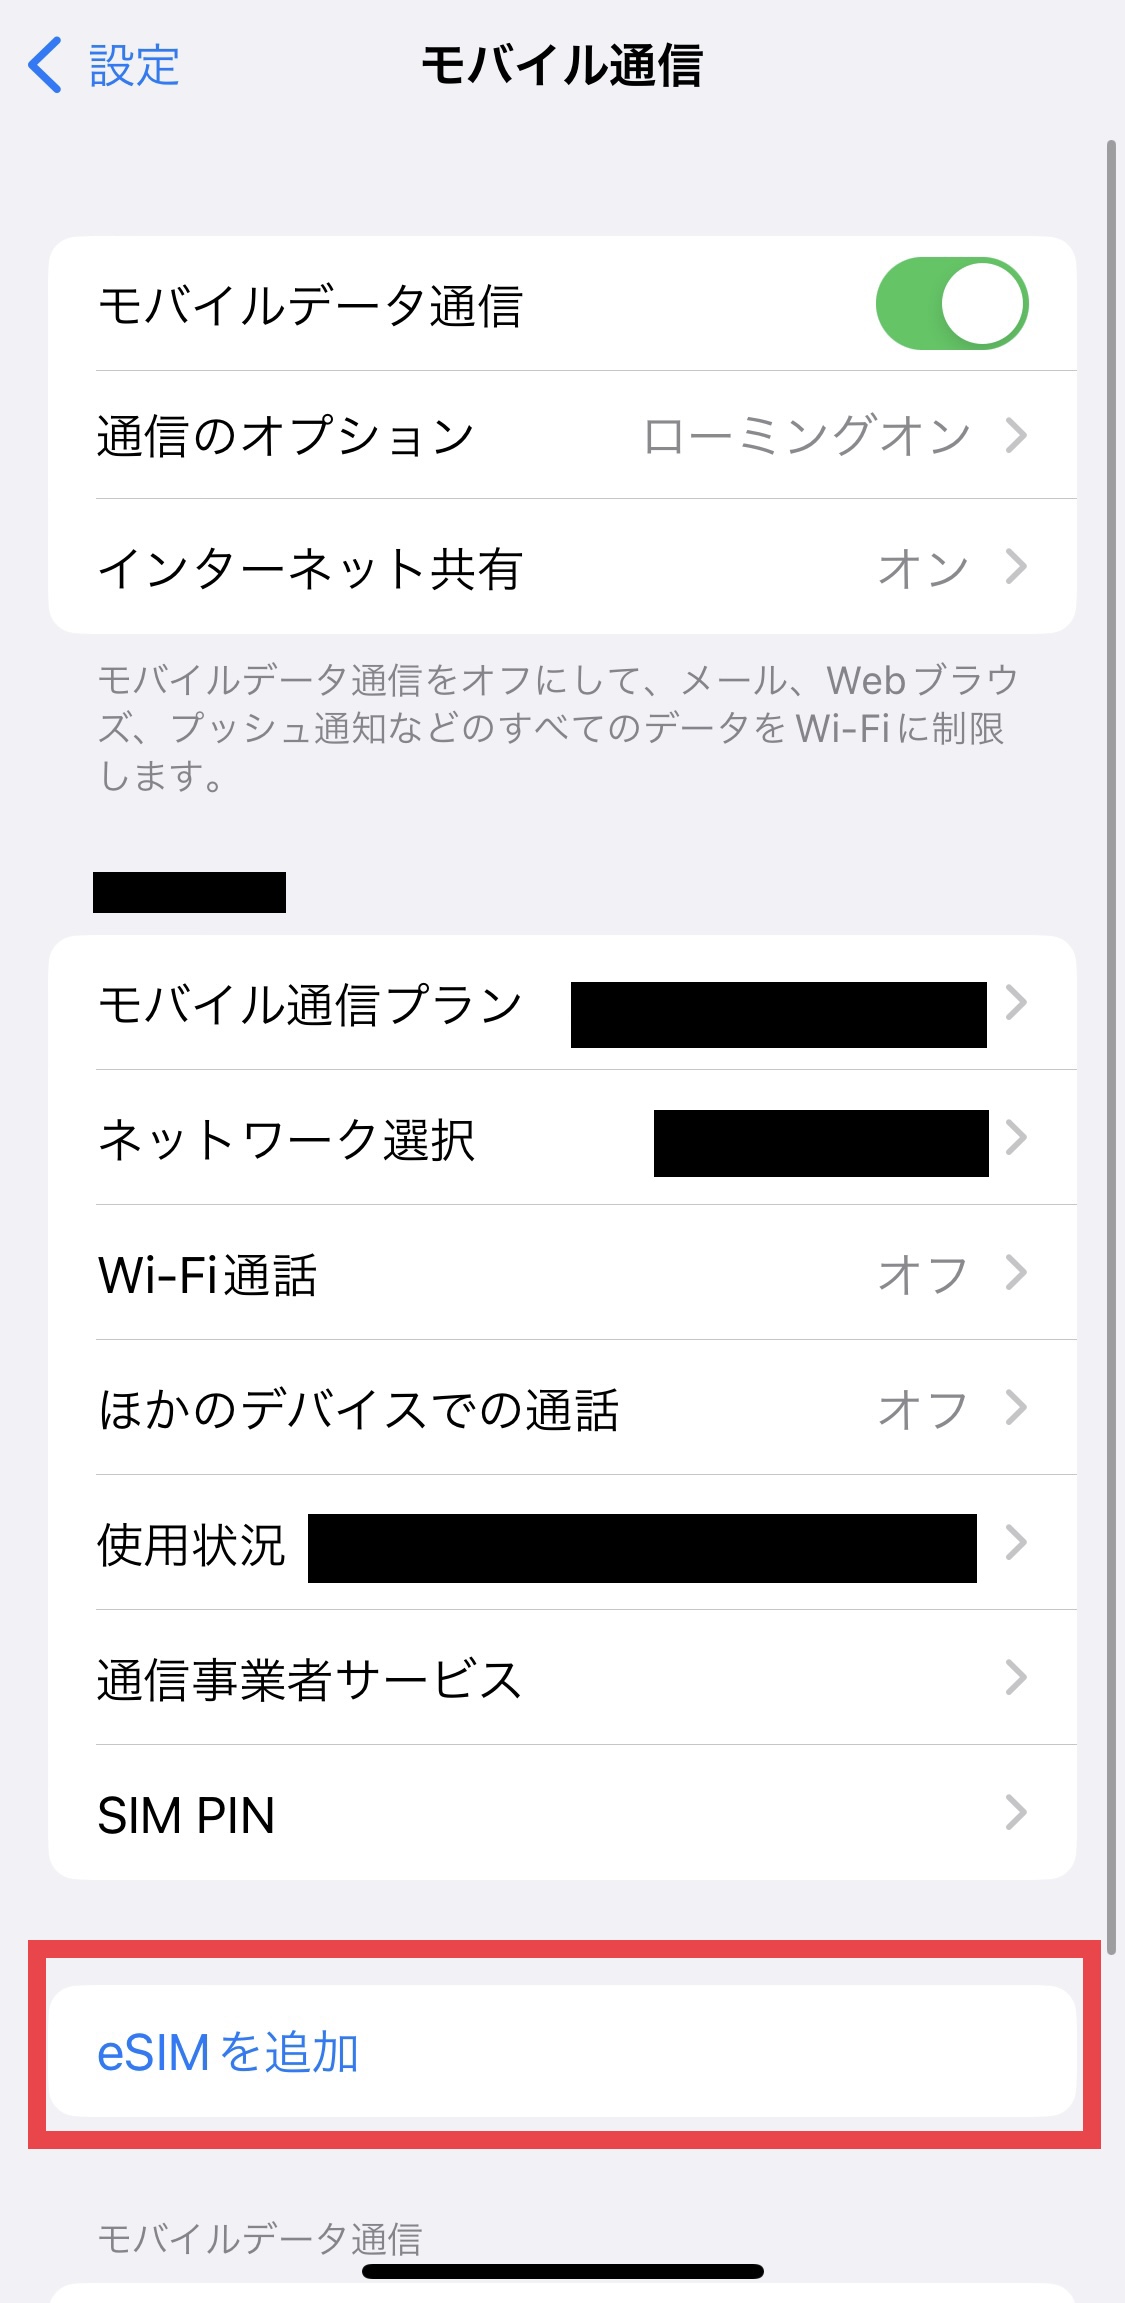
② Tap [Add eSIM].
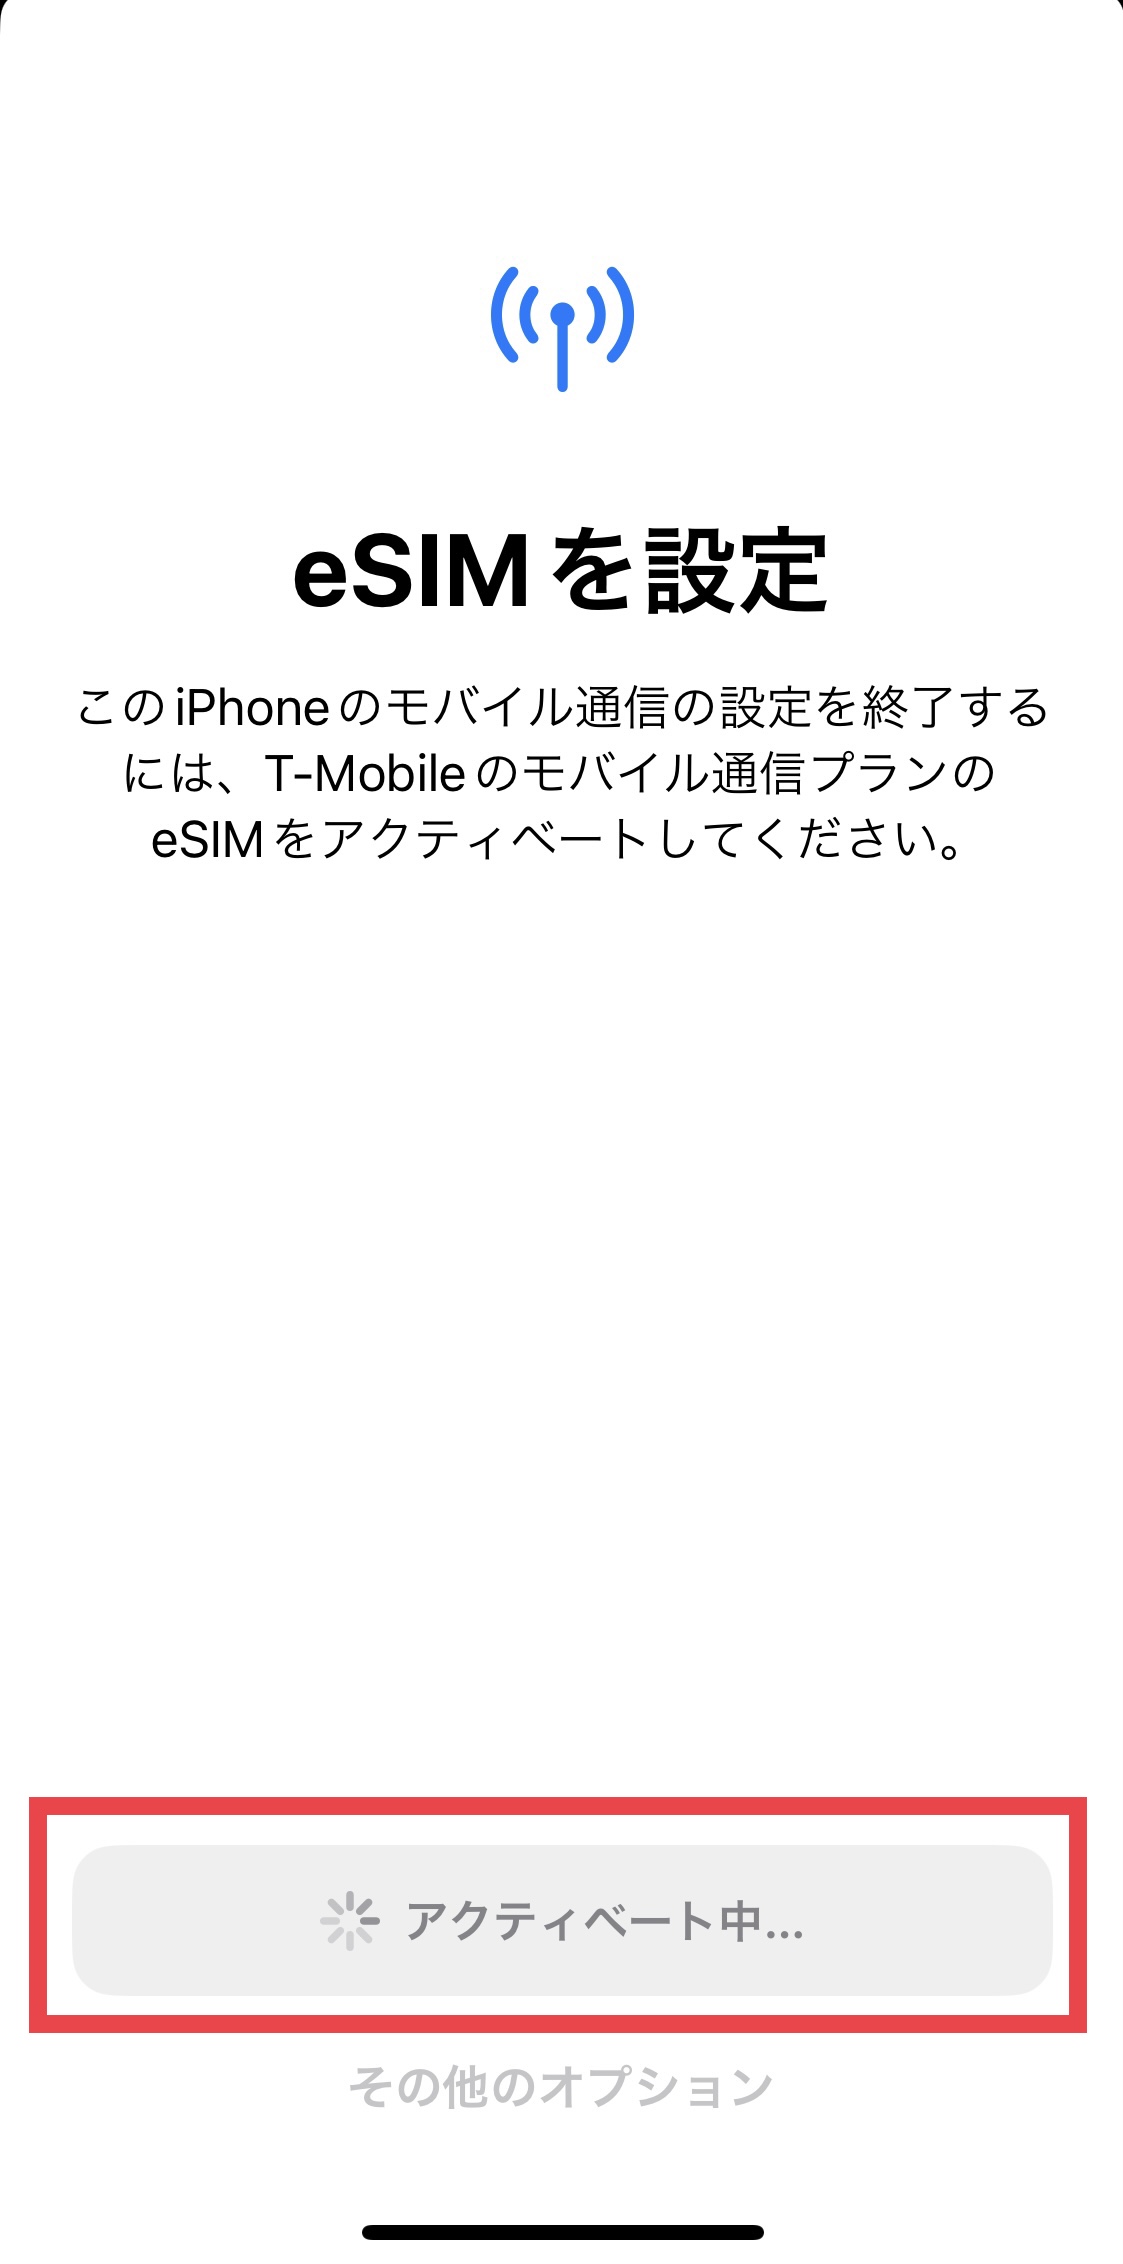
③ Tap [Set Up eSIM].

Setup takes approximately 30 seconds.
Please wait while the screen displays [Activating].
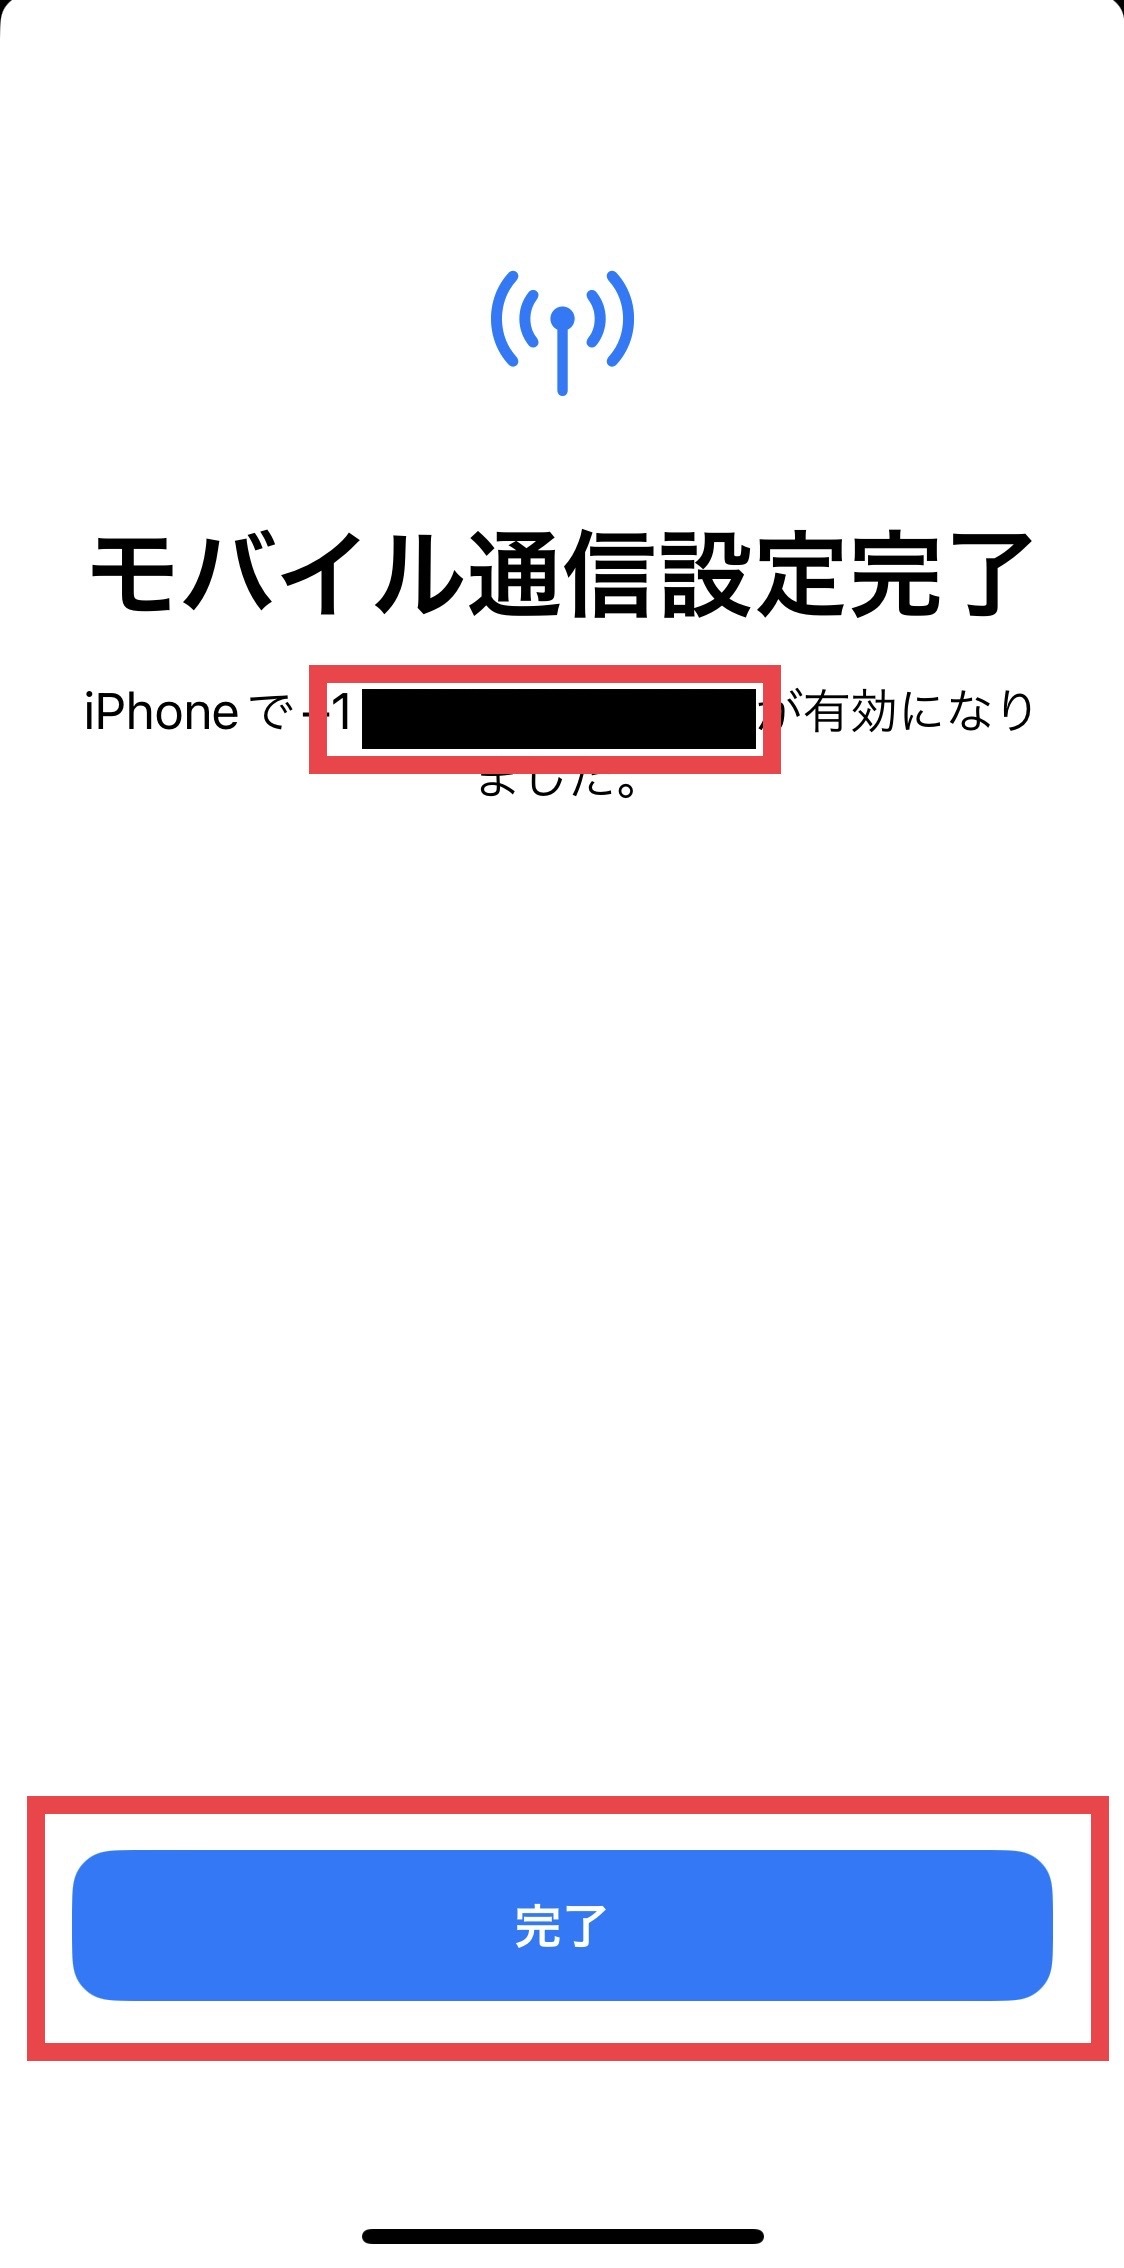
④ The message “Cellular Setup Complete” will be displayed.
The phone number displayed on the screen is your assigned phone number.
Tap [Done] to proceed to the next screen.
⑤ Set a name for your cellular plan.
You can choose any name you like.
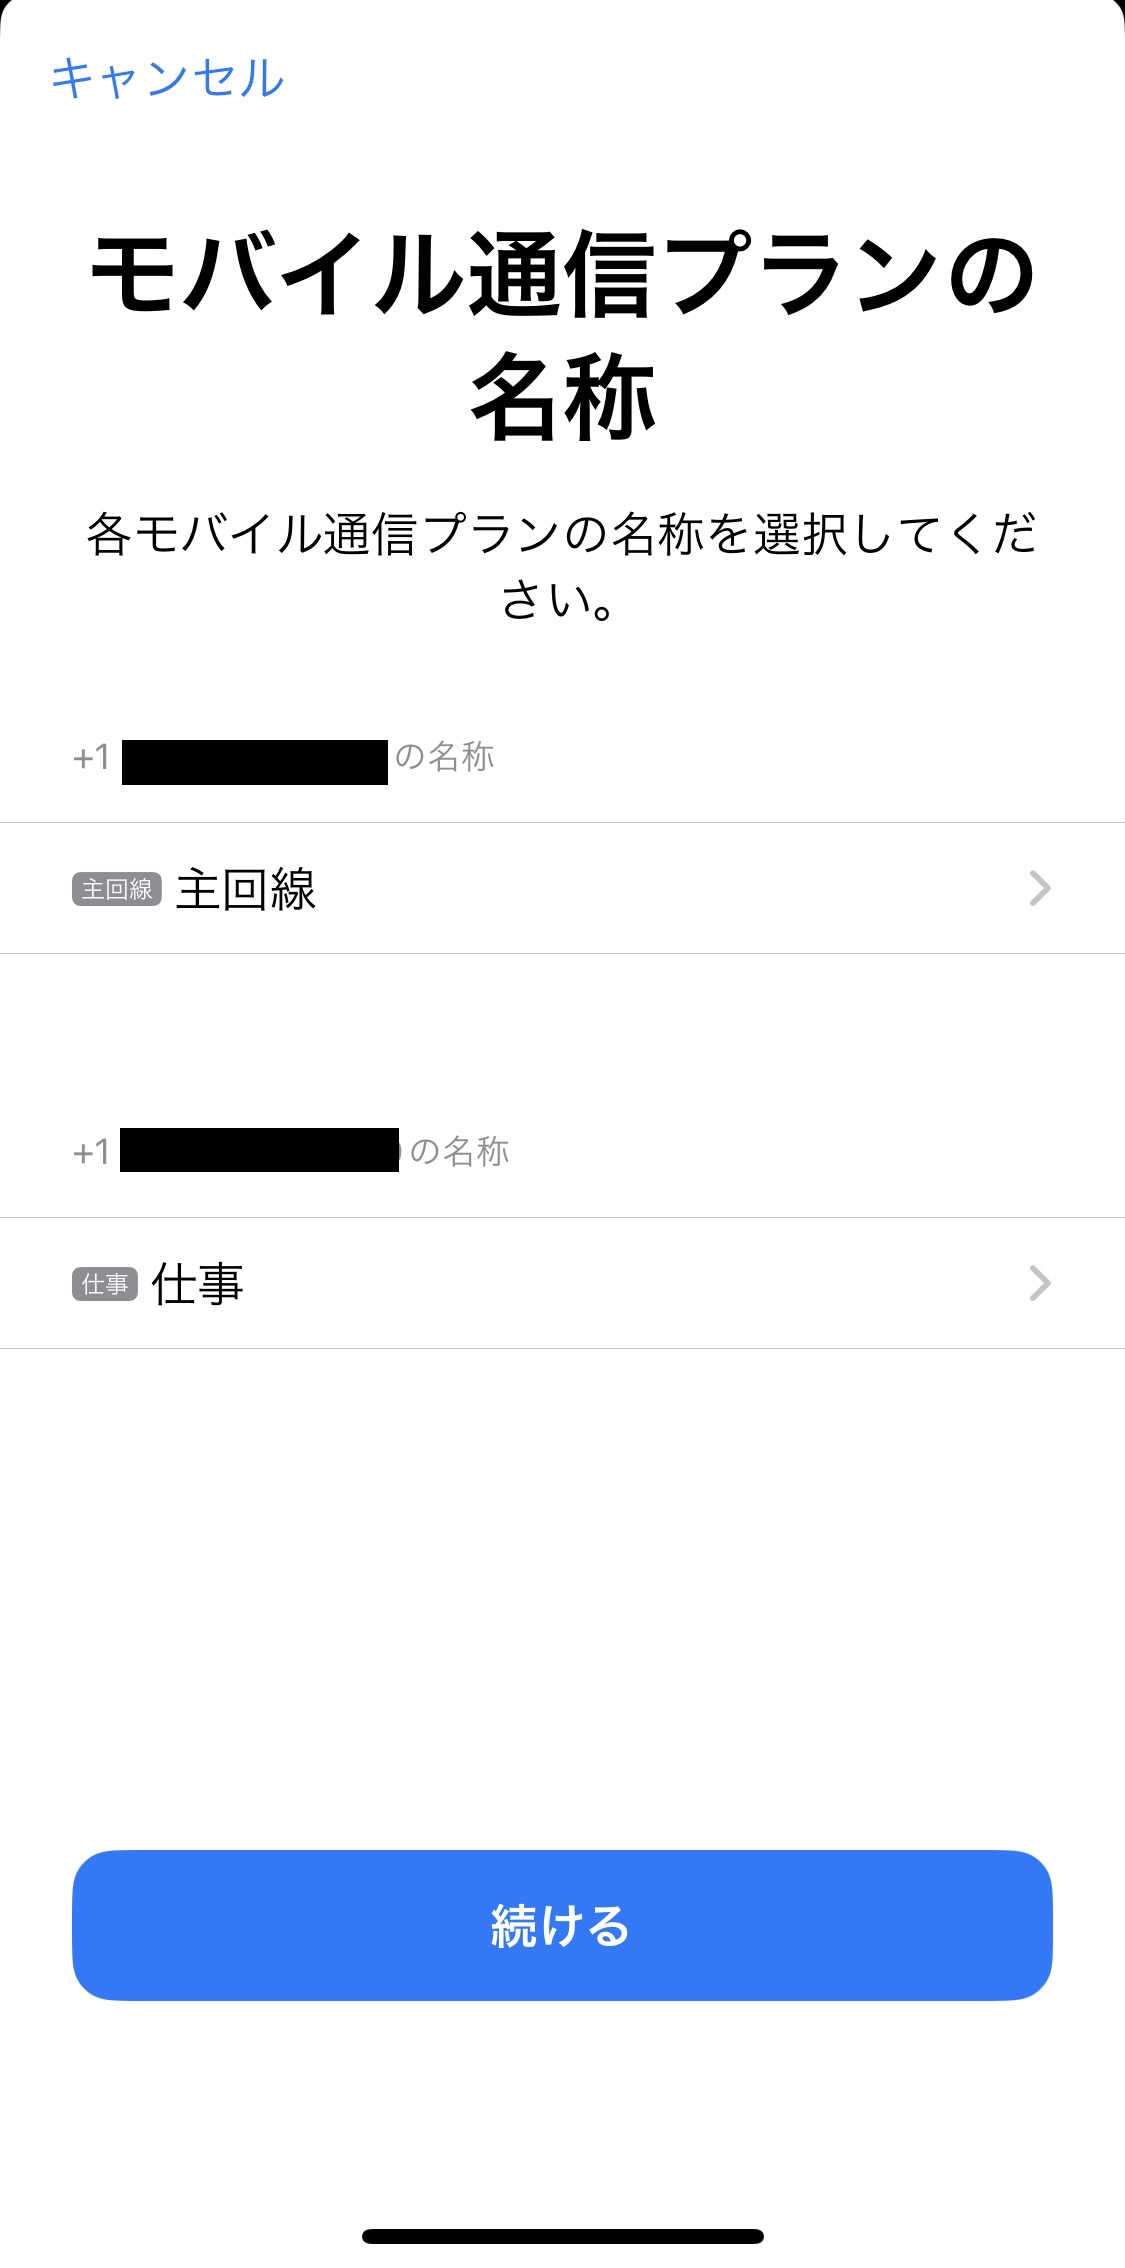
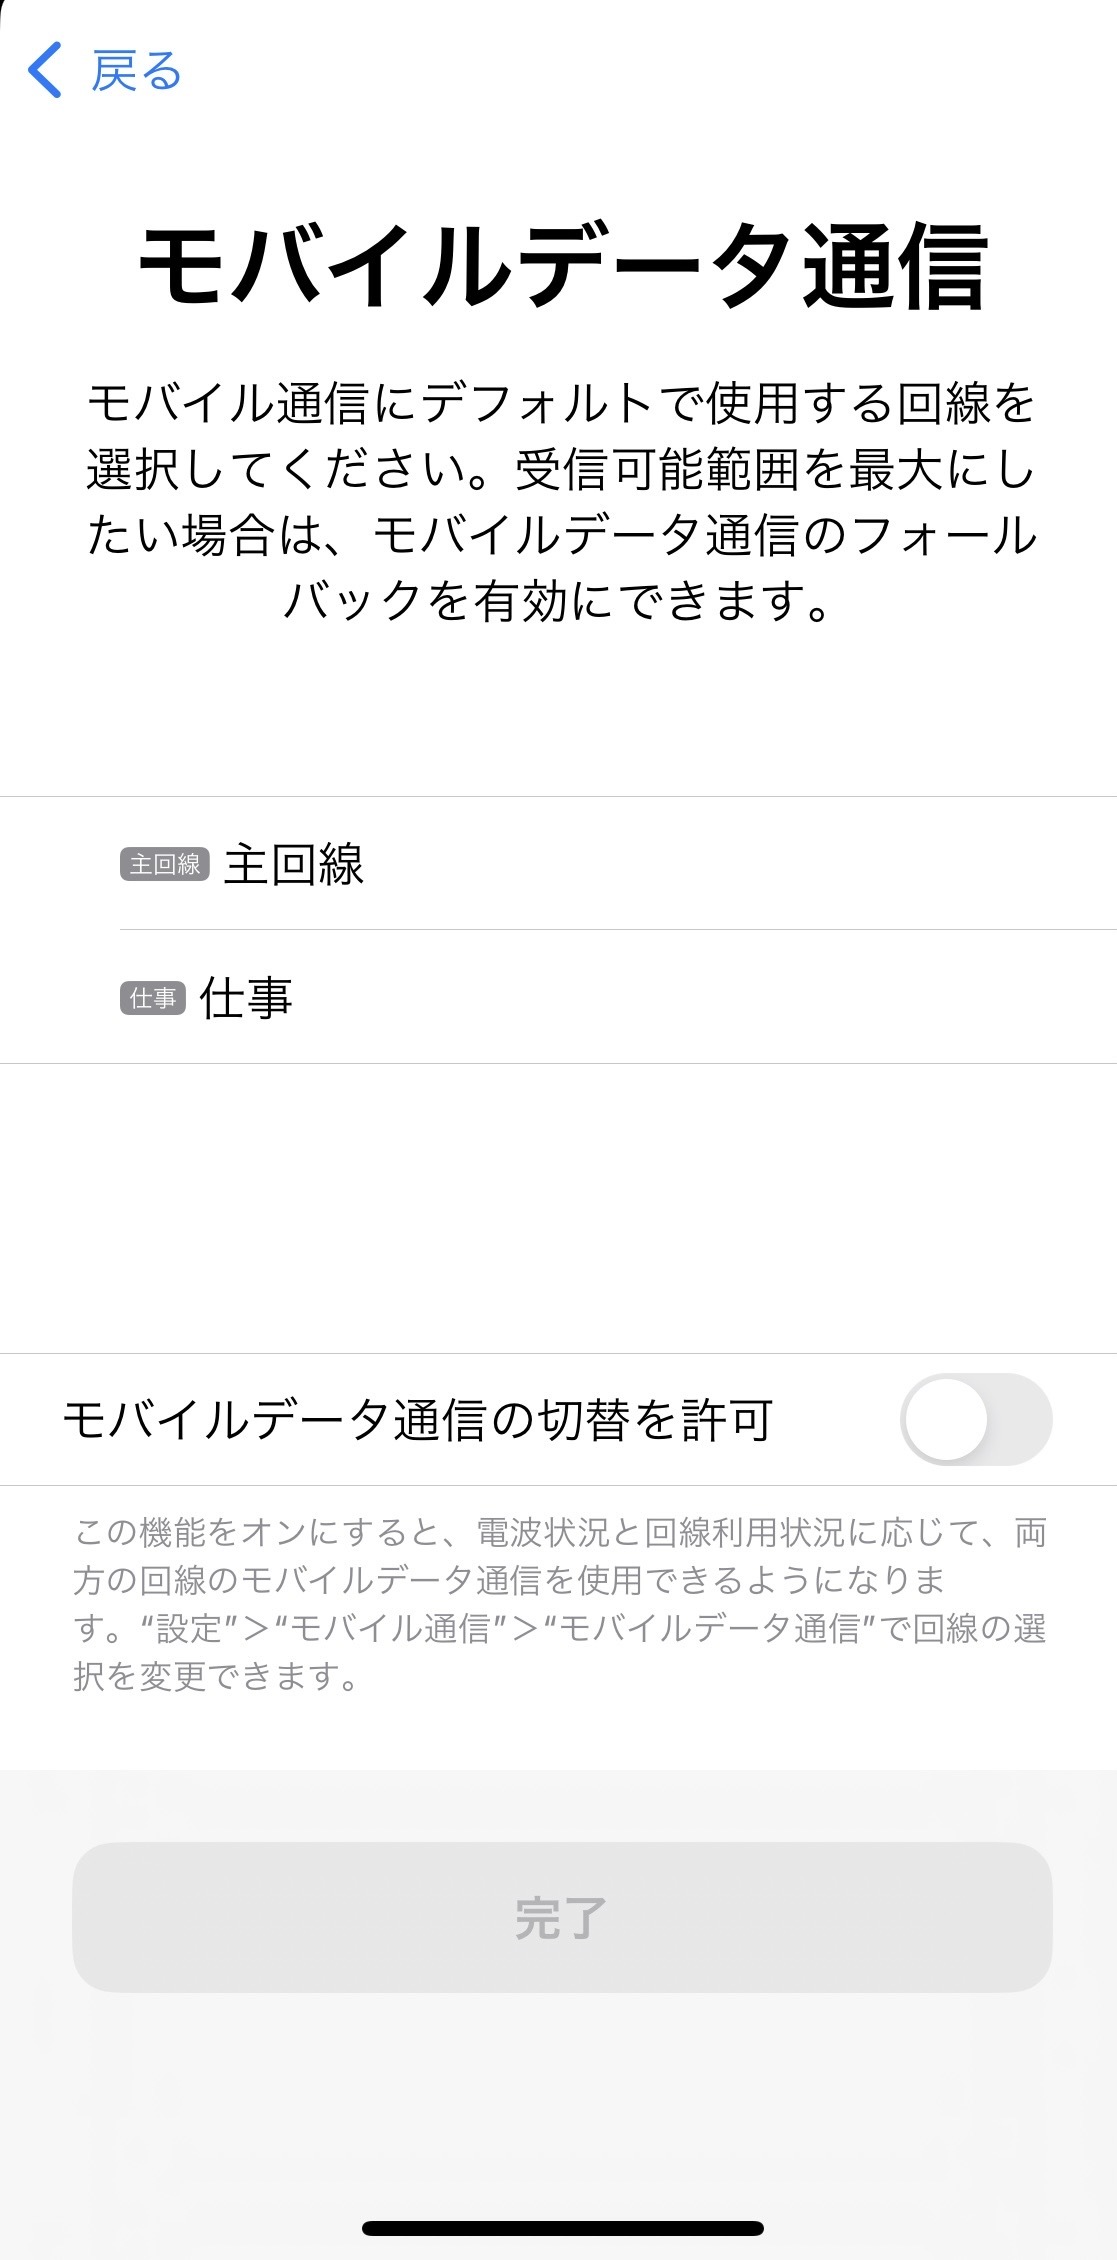
On the next screen, select the newly added eSIM (the plan name you just set) as the default cellular plan.
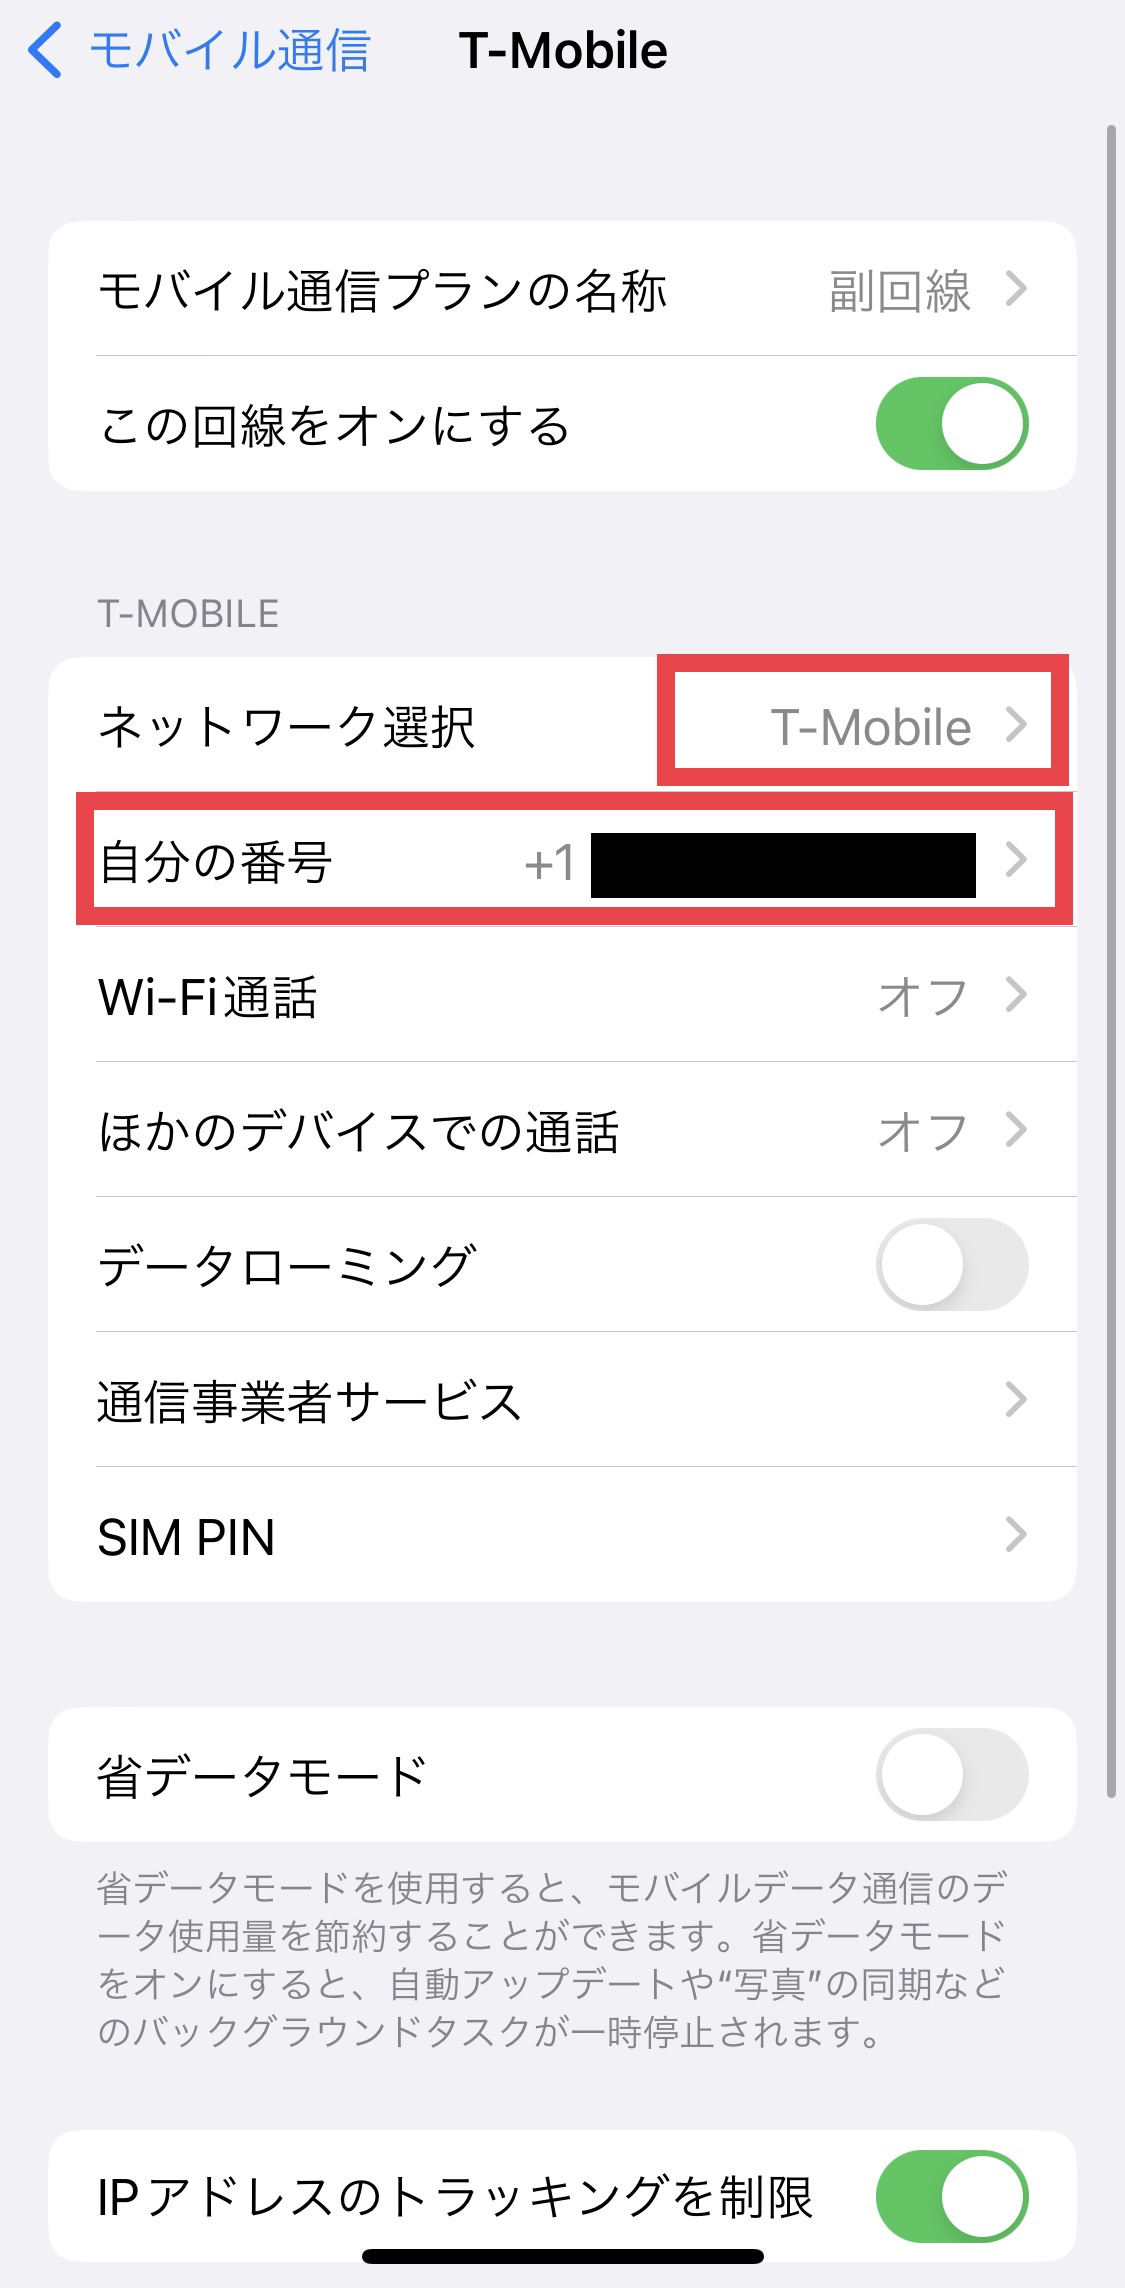
⑥ T-Mobile and your assigned phone number will be added under [Cellular].
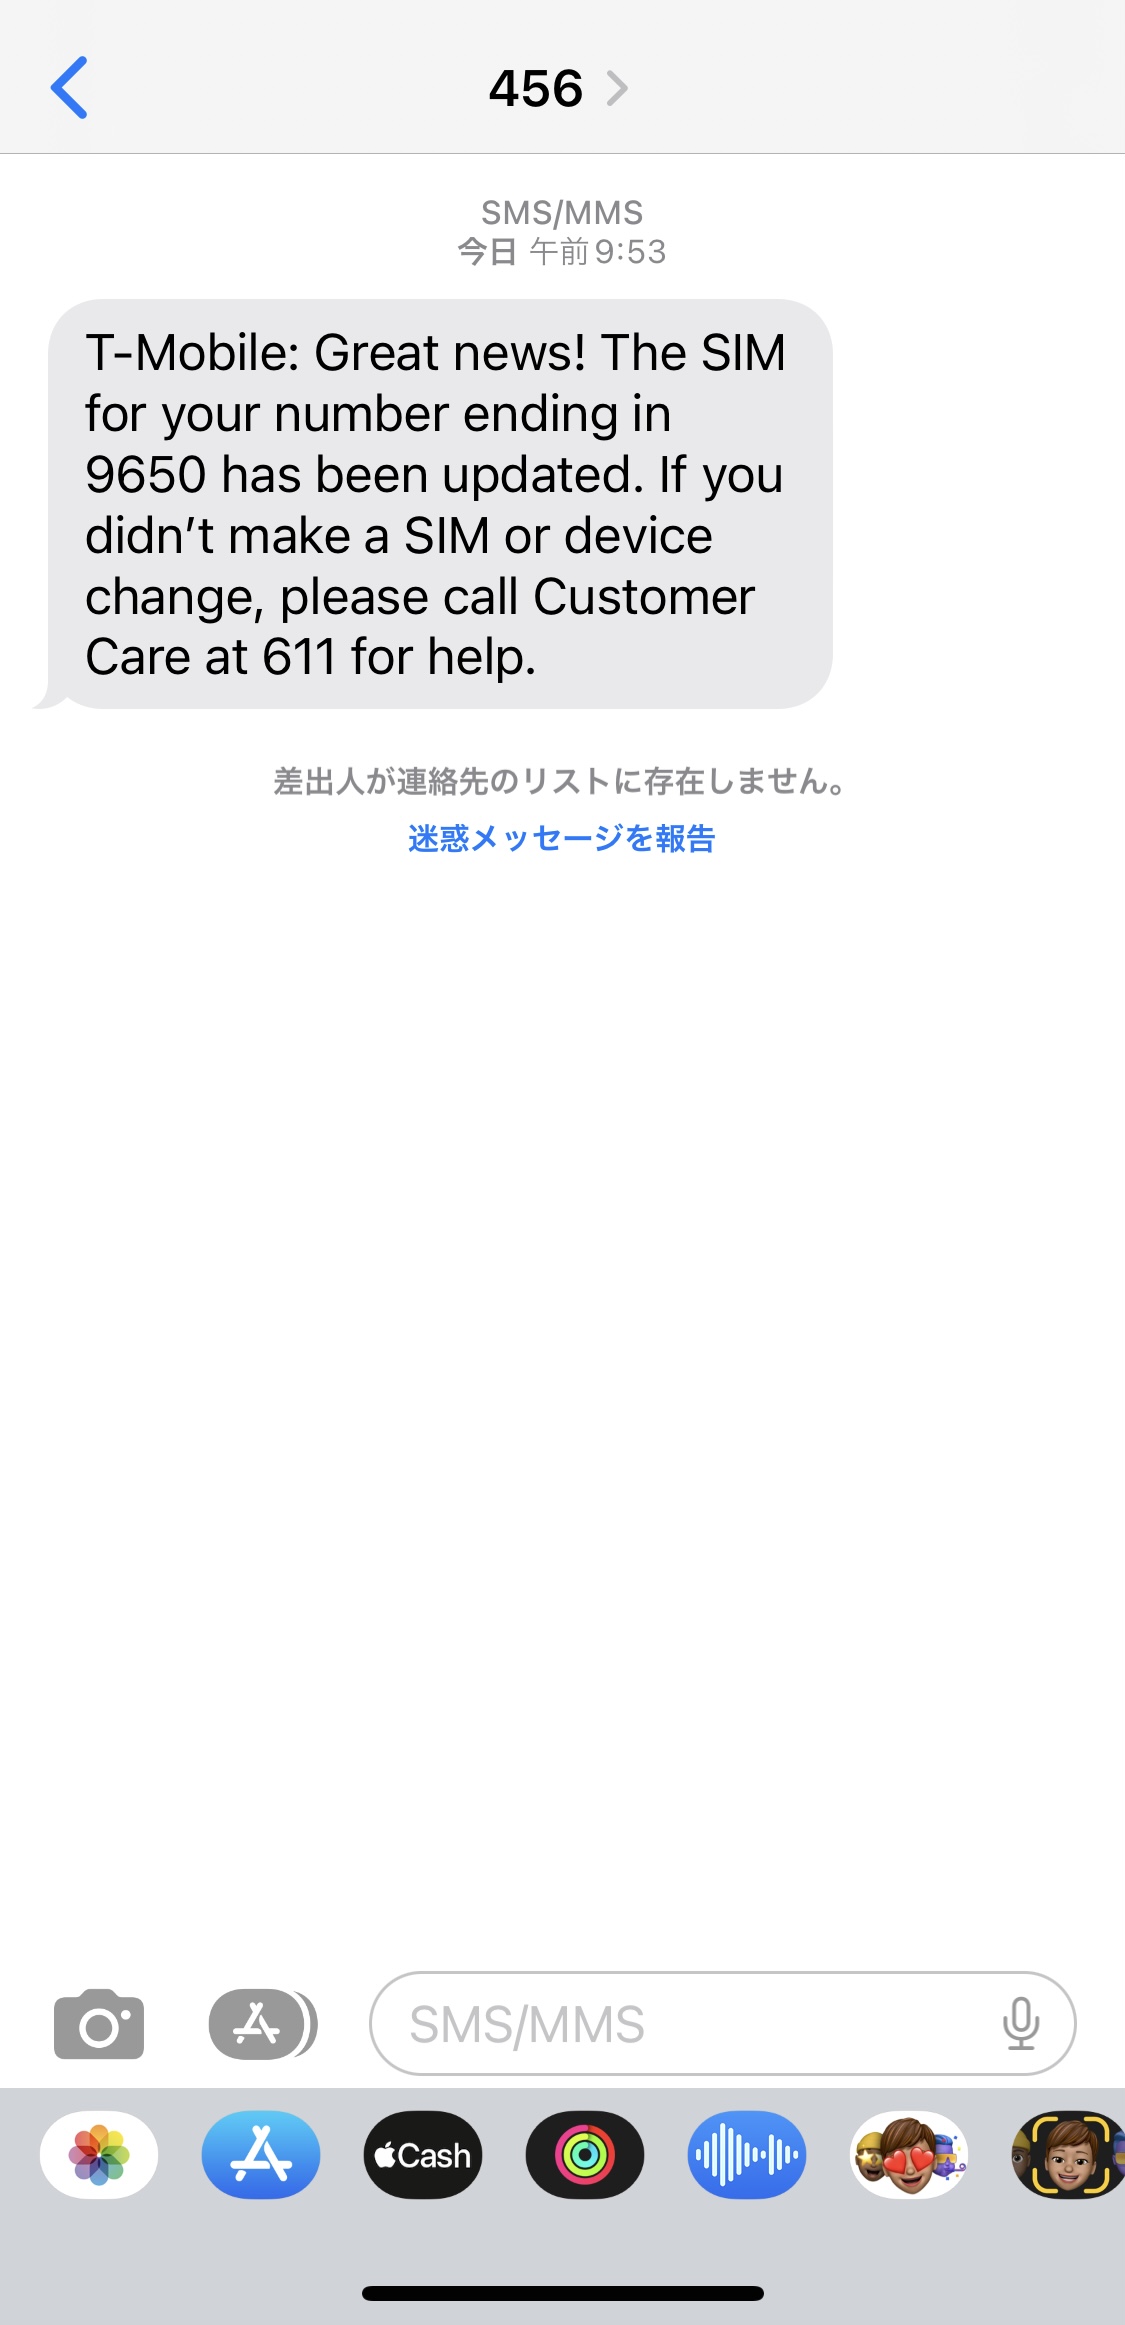
Once the eSIM has been added and set up, you will receive an SMS.
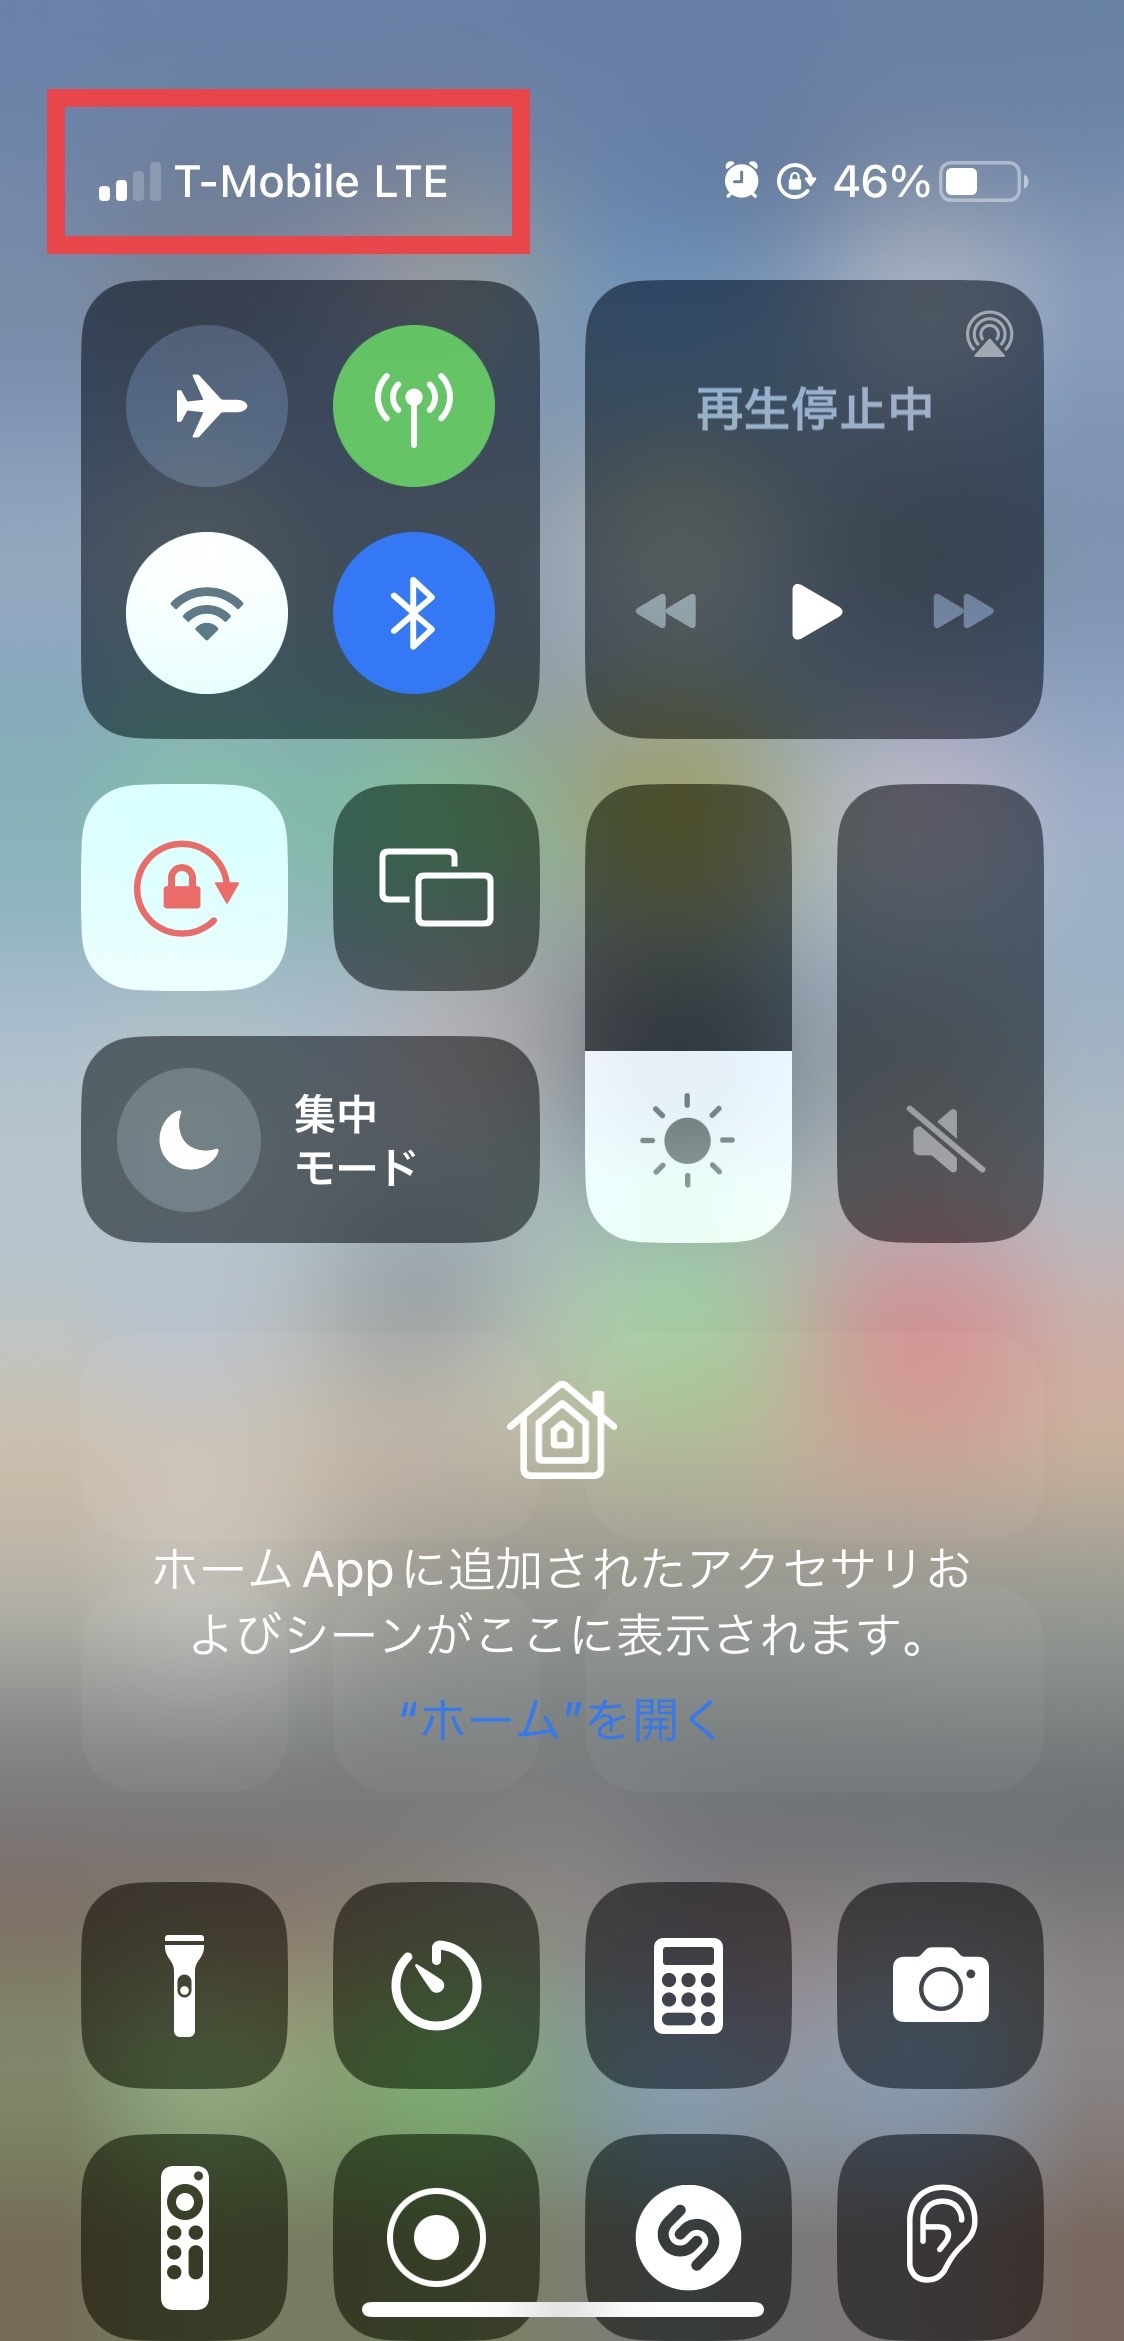
⑦ Check that you have a T-Mobile signal.The eSIM setup is now complete.
=====================
〈How to Check Your Phone Number〉
▼For Android devices
[Settings] → [About Phone] → [Phone Number]
▼For iOS devices (iPhone)
[Settings] → [Phone] → [My Number]
※If your phone number is not displayed, please restart your smartphone.
=====================
〈Troubleshooting: If You Cannot Add the eSIM〉
・Try adding the eSIM after connecting to Wi-Fi.
・Check for any carrier settings updates and update your iPhone to the latest version of iOS.
・Turn Airplane Mode on for about 30 seconds, then turn it off again.
・Reset your network settings.
[Settings] → [General] → [Transfer or Reset iPhone] → [Reset] → [Reset Network Settings]
※Please note that resetting your network settings will also reset your saved Wi-Fi settings.
・Turn off VPNs and antivirus/security software (such as Norton).
Was this article helpful?
Thank you for your feedback!