
How to Add an eSIM Plan
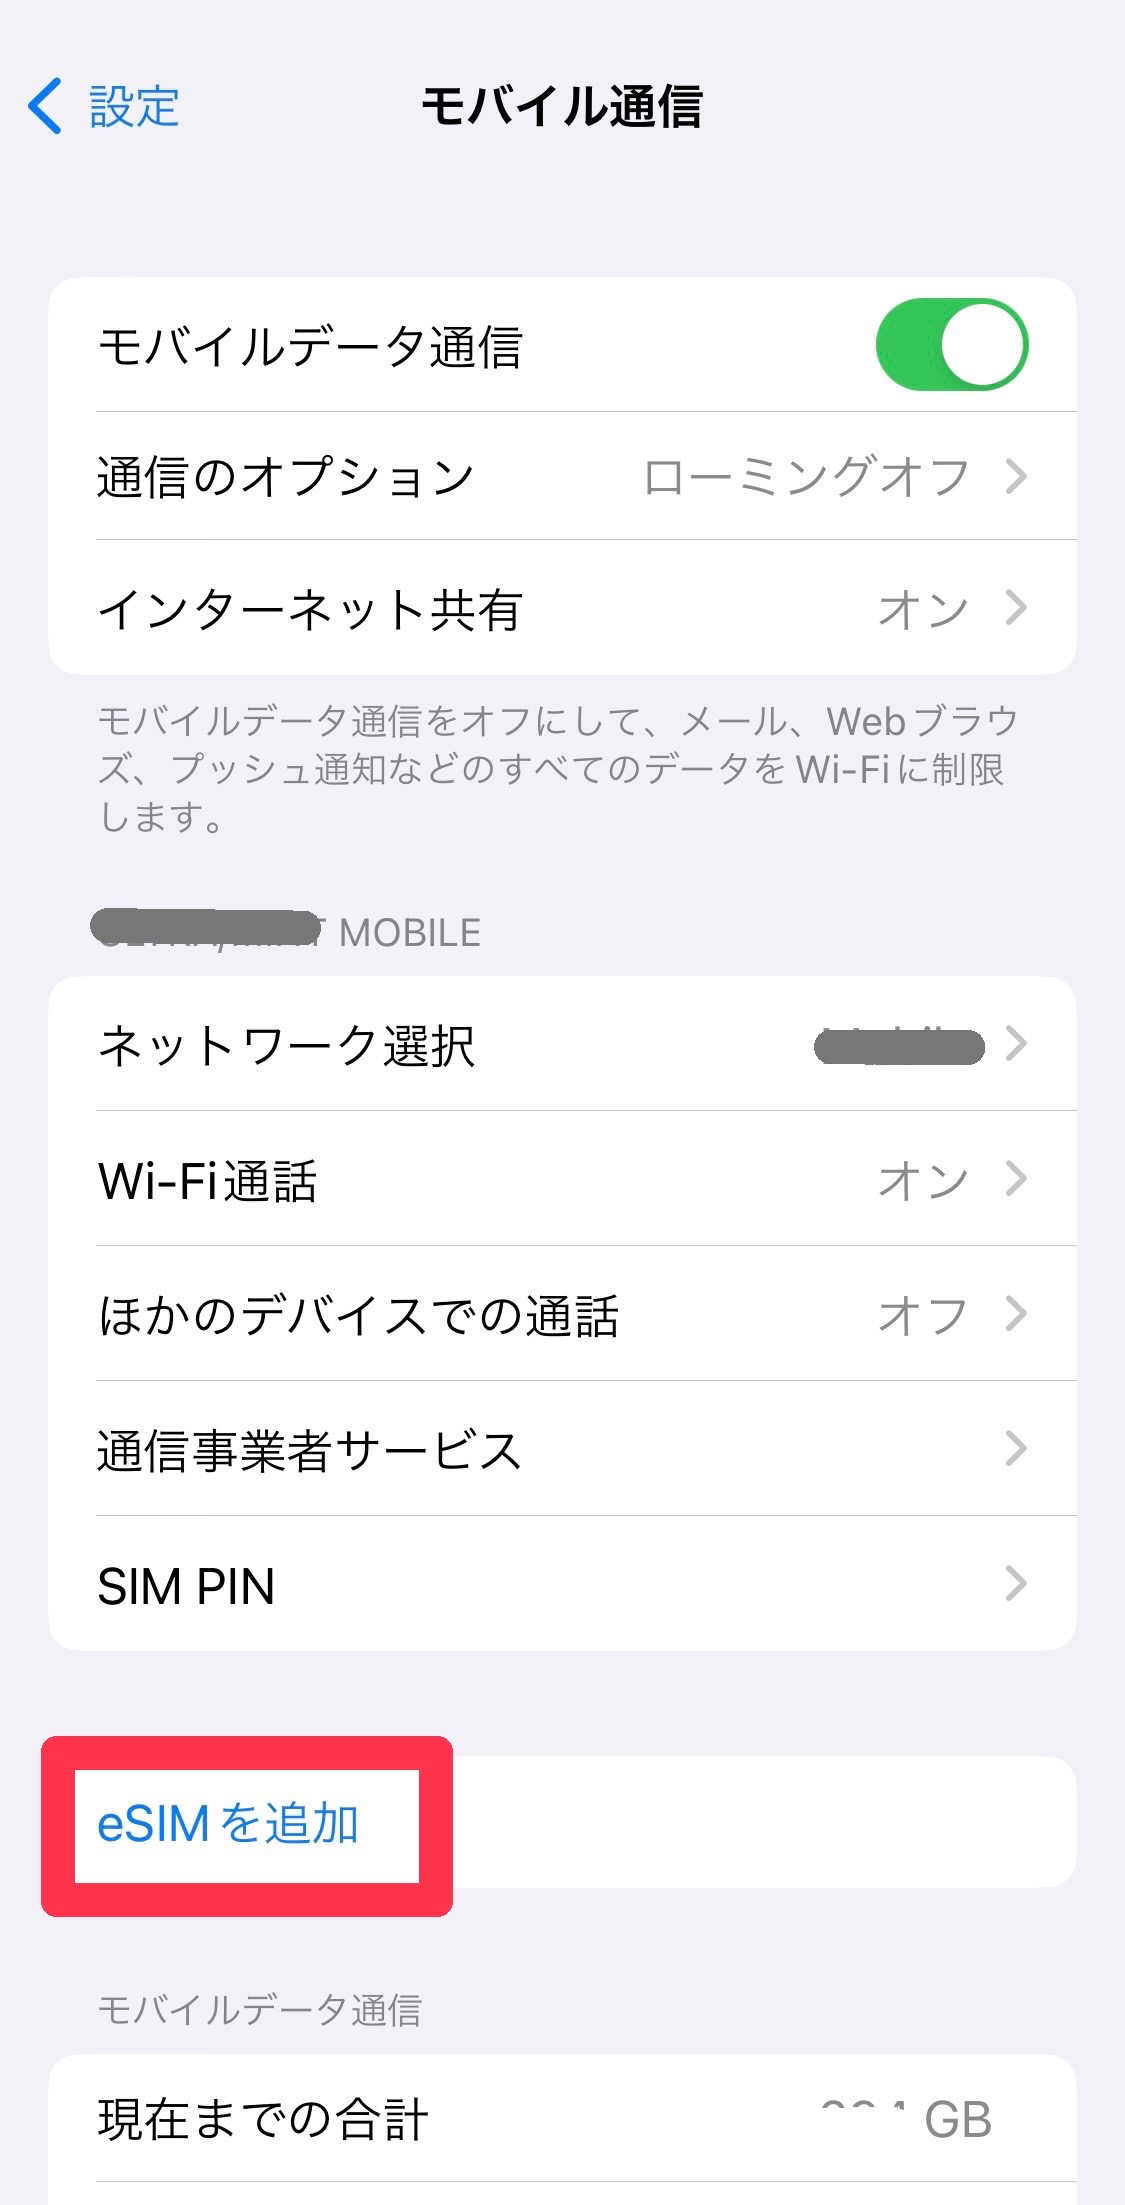
① Open the “Settings” app on your smartphone and tap “Mobile Service.”

② Tap “Add eSIM.”
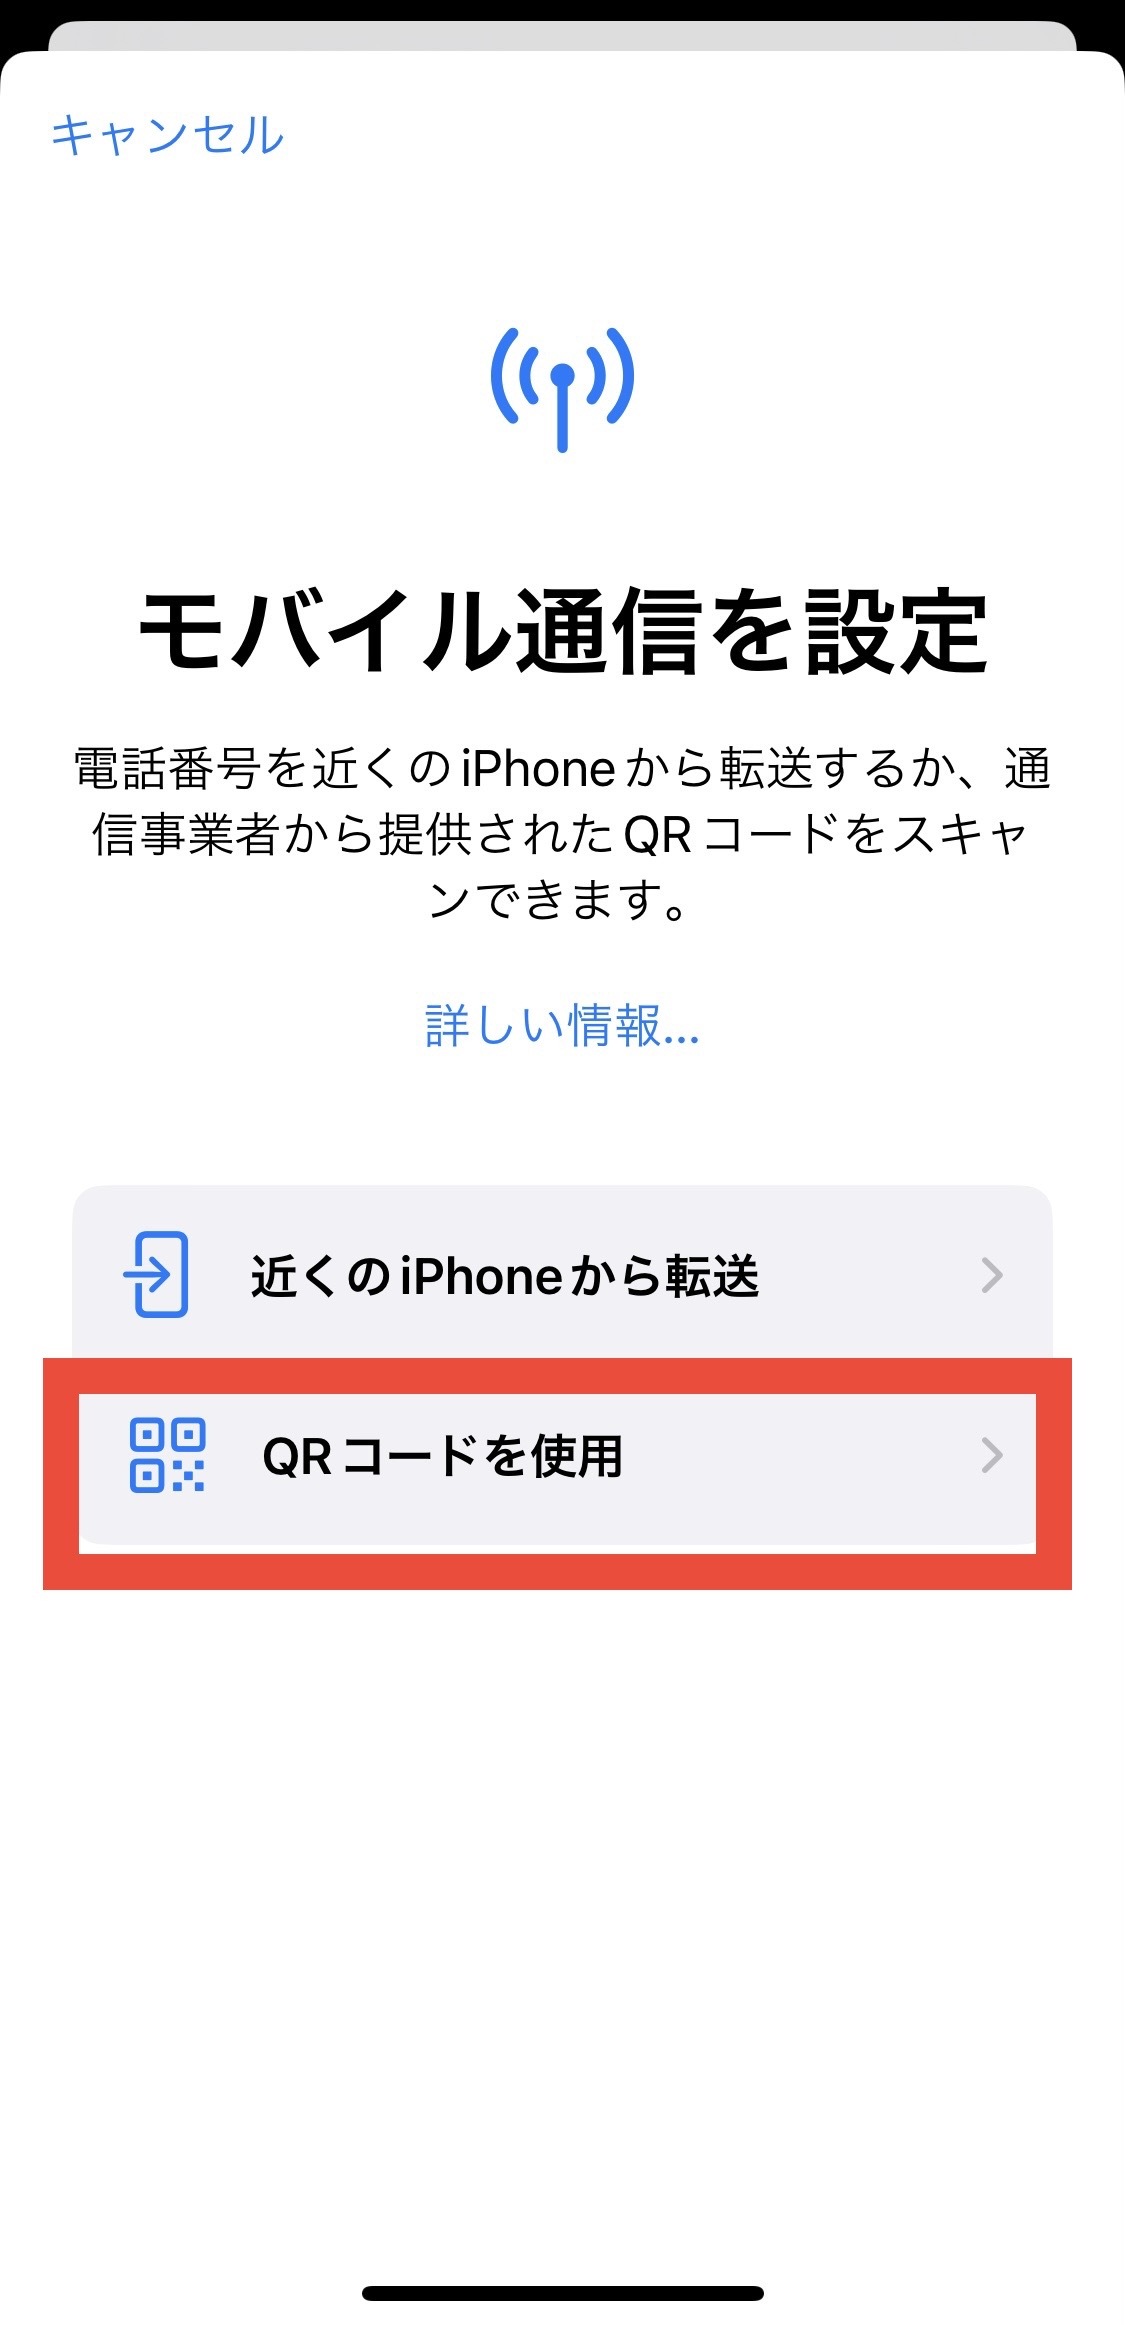
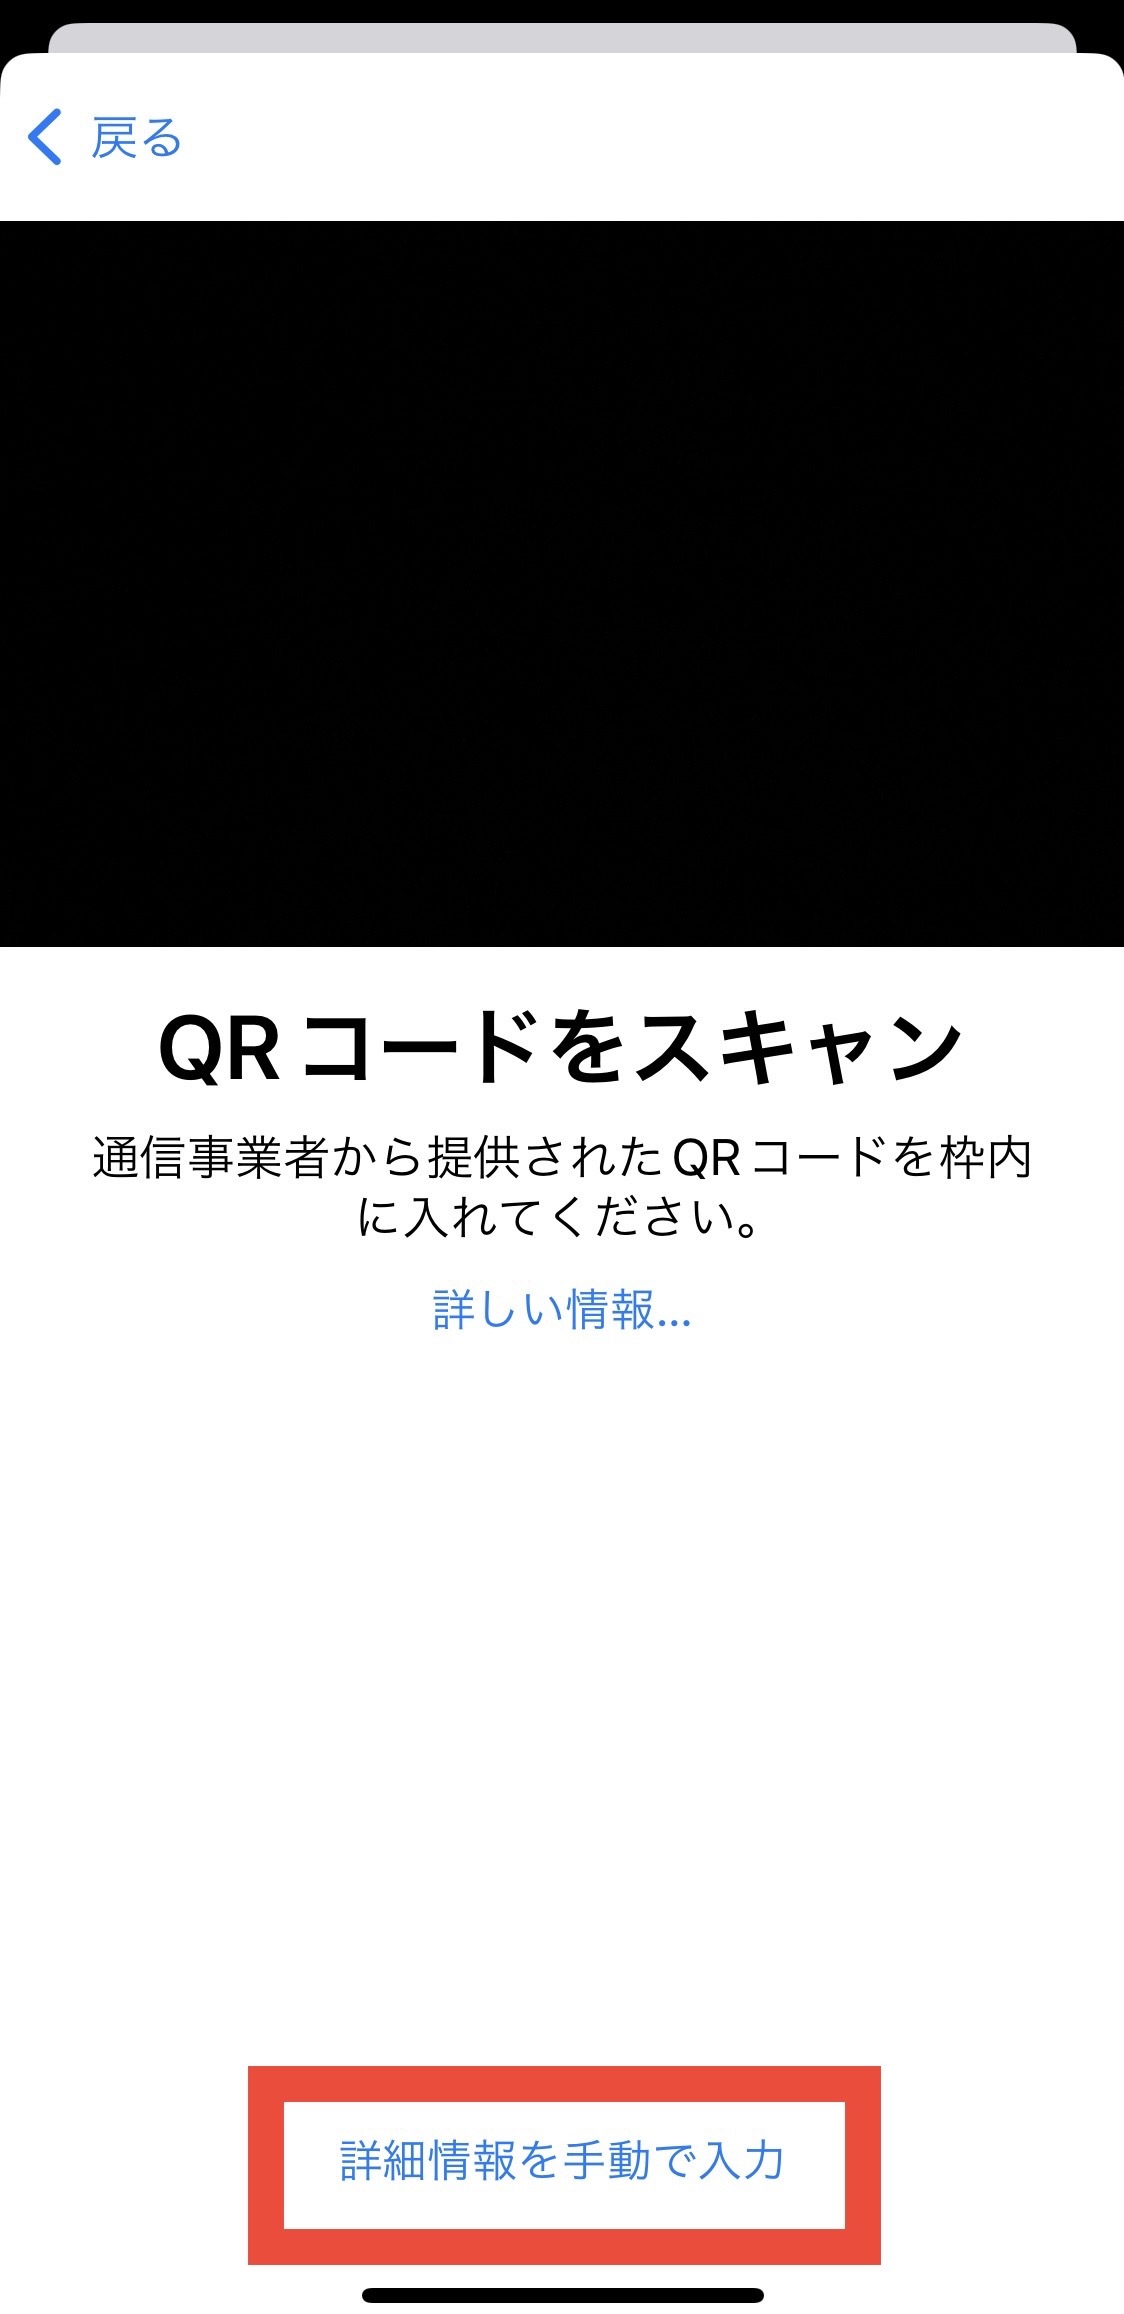
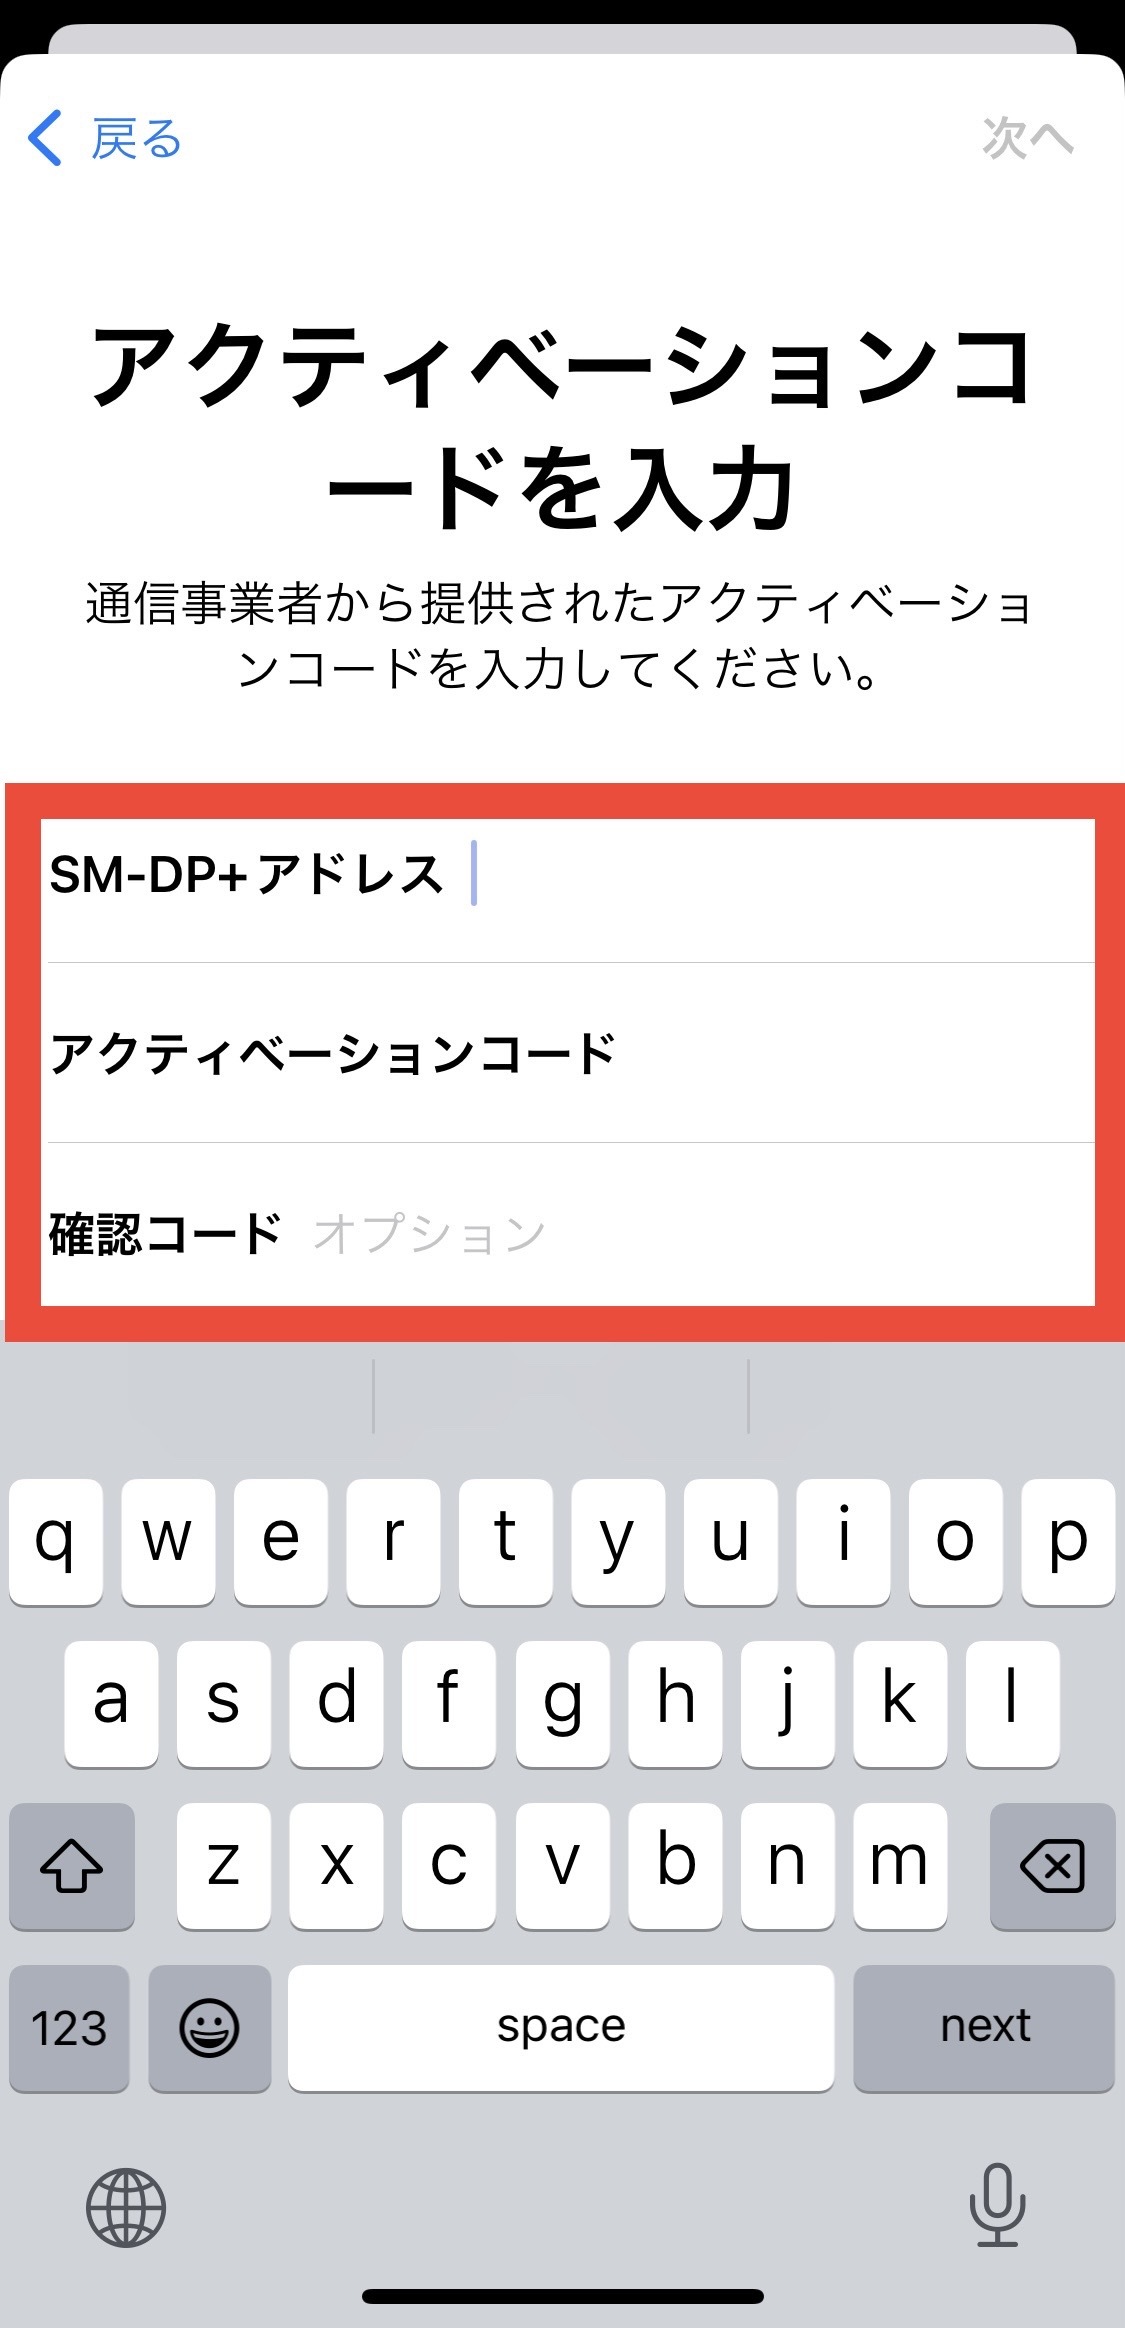
③ Tap “Use QR Code” → “Enter Details Manually.”
SM-DP+ Address: Enter T-MOBILE.GDSB.NET
Do not enter the Activation Code or Confirmation Code. Tap “Next” to continue.
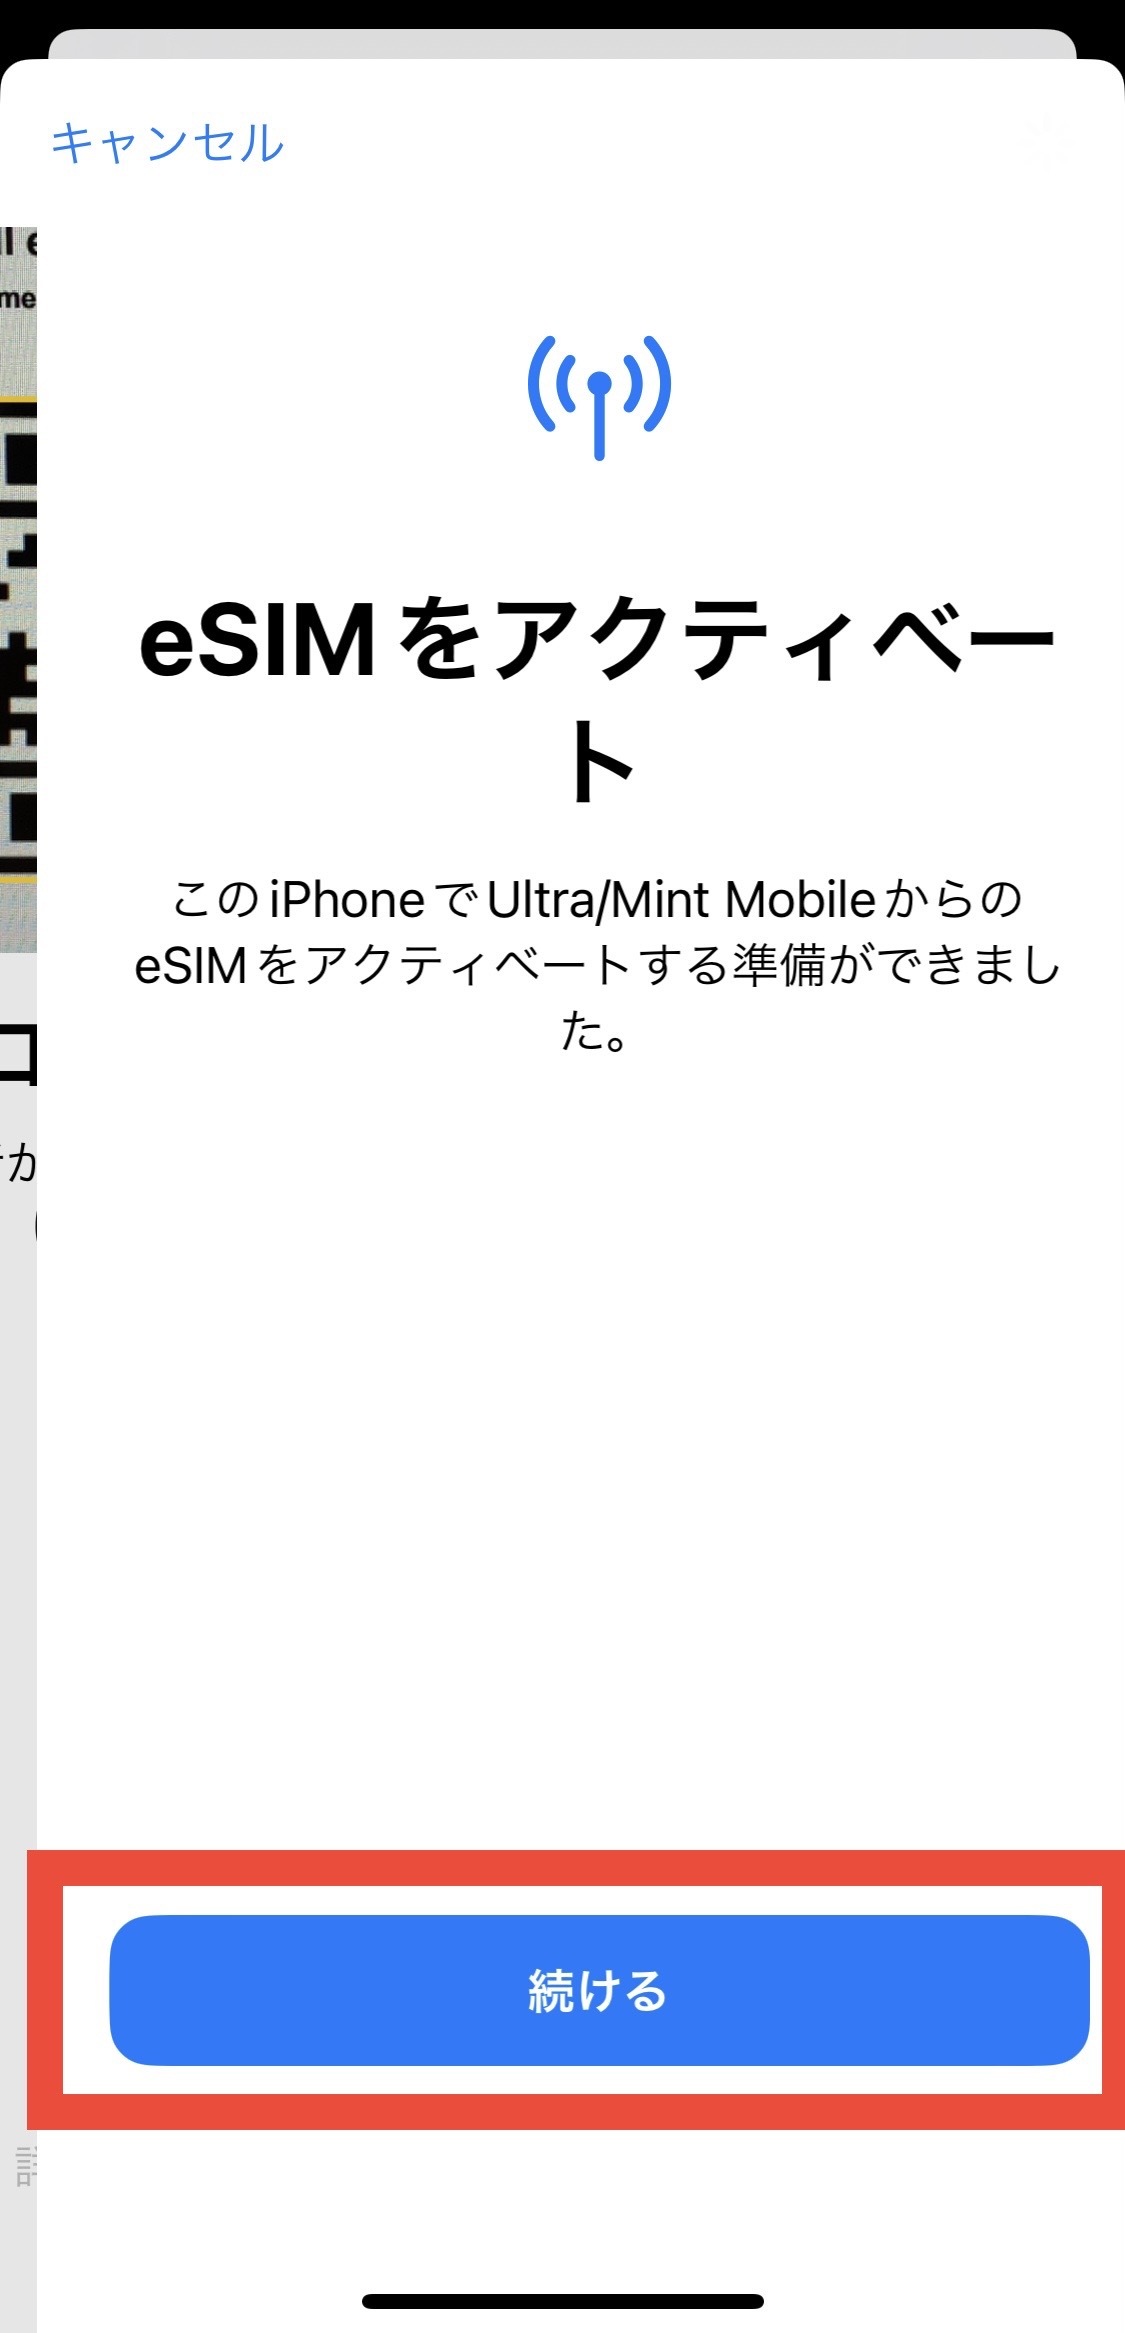
④ When “Activate eSIM” appears, tap “Continue.”
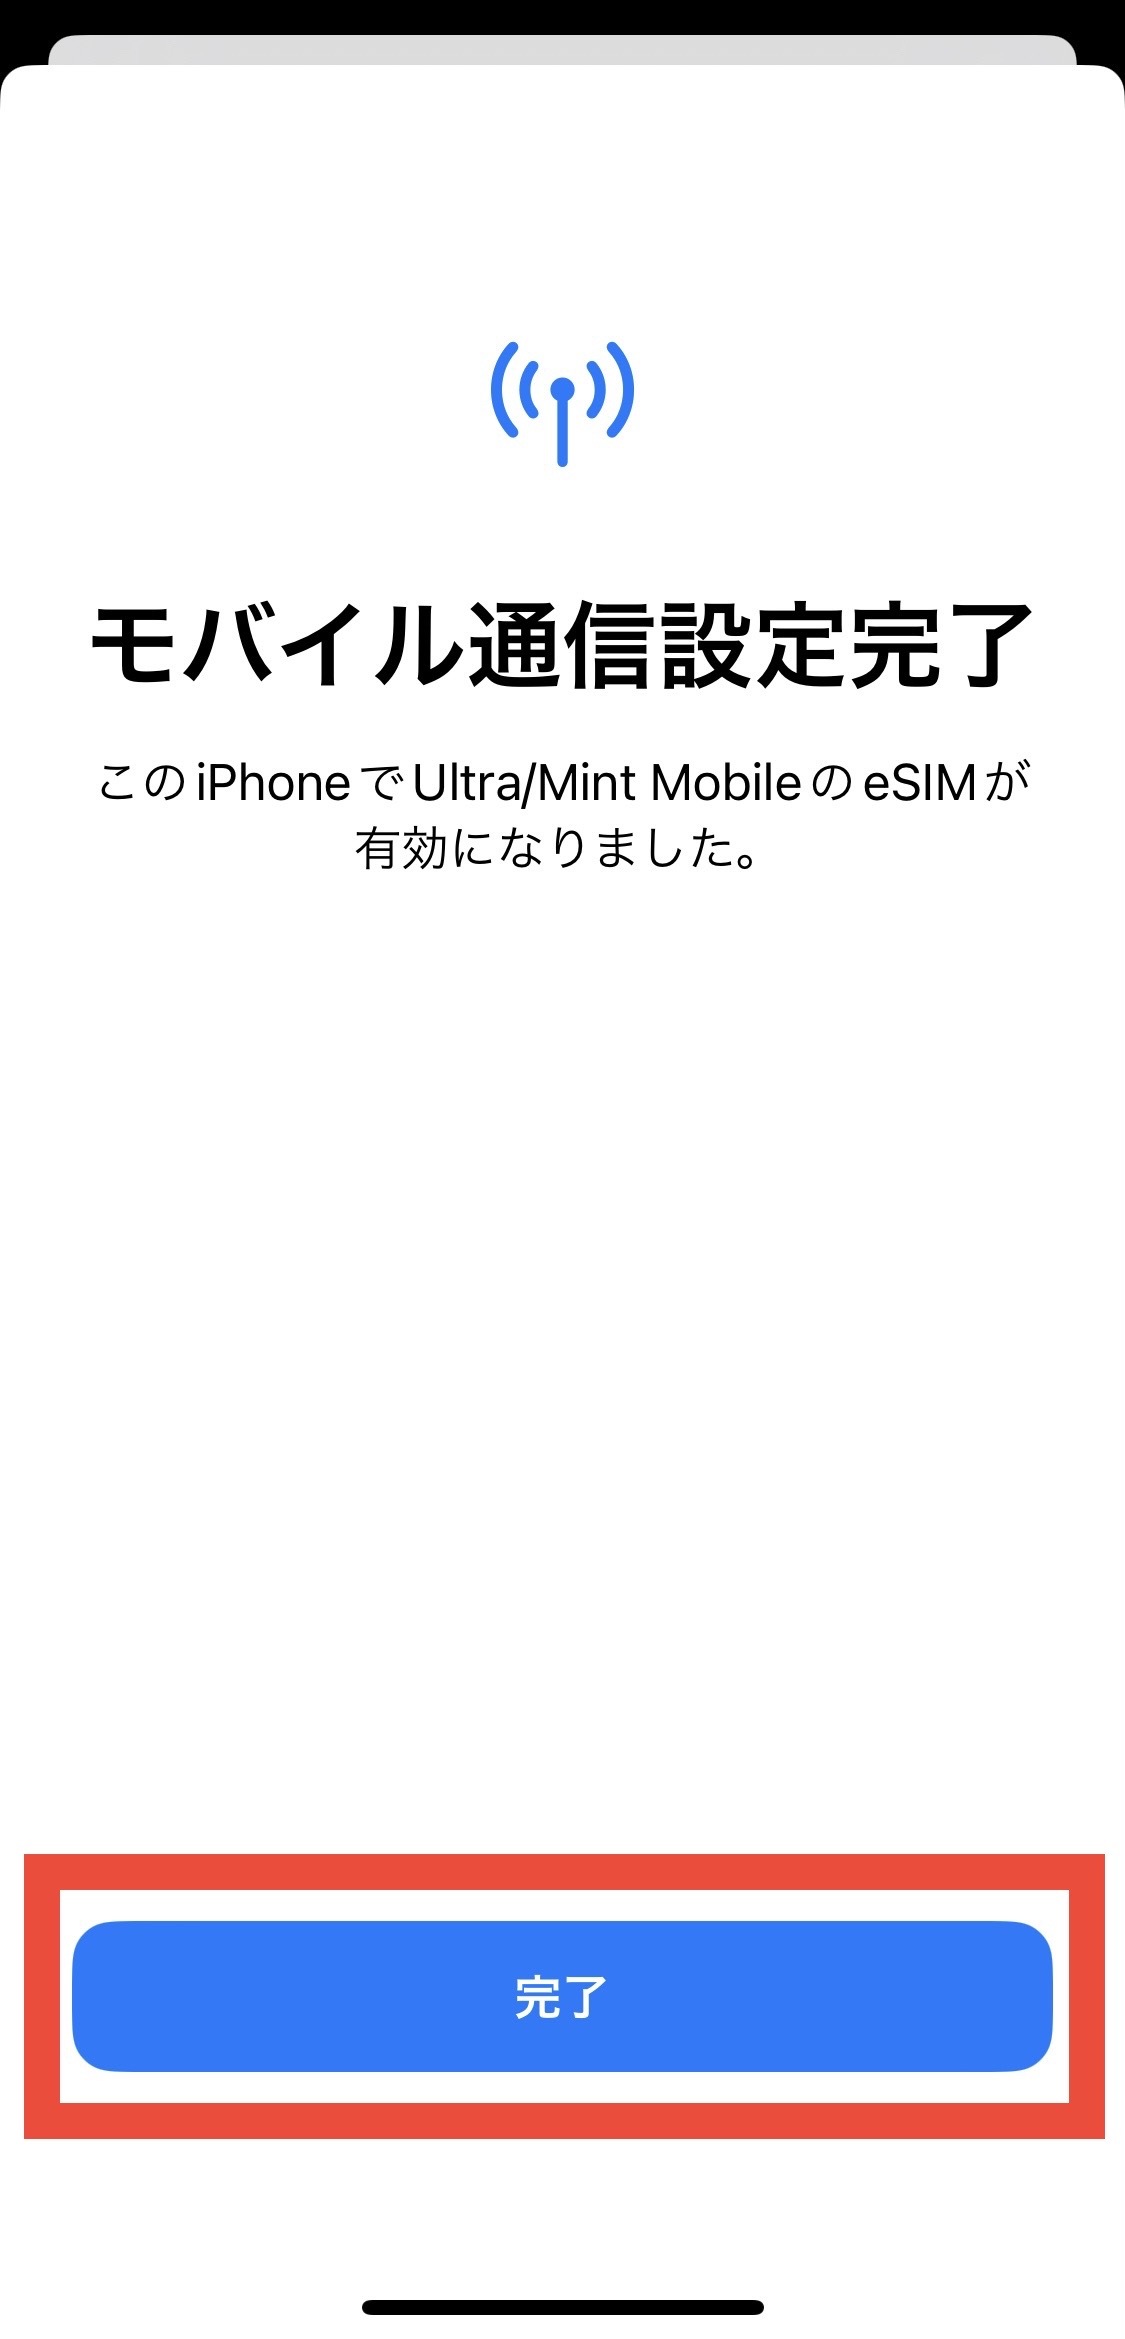
⑤ When “Mobile Service Setup Complete” appears, tap “Done.”
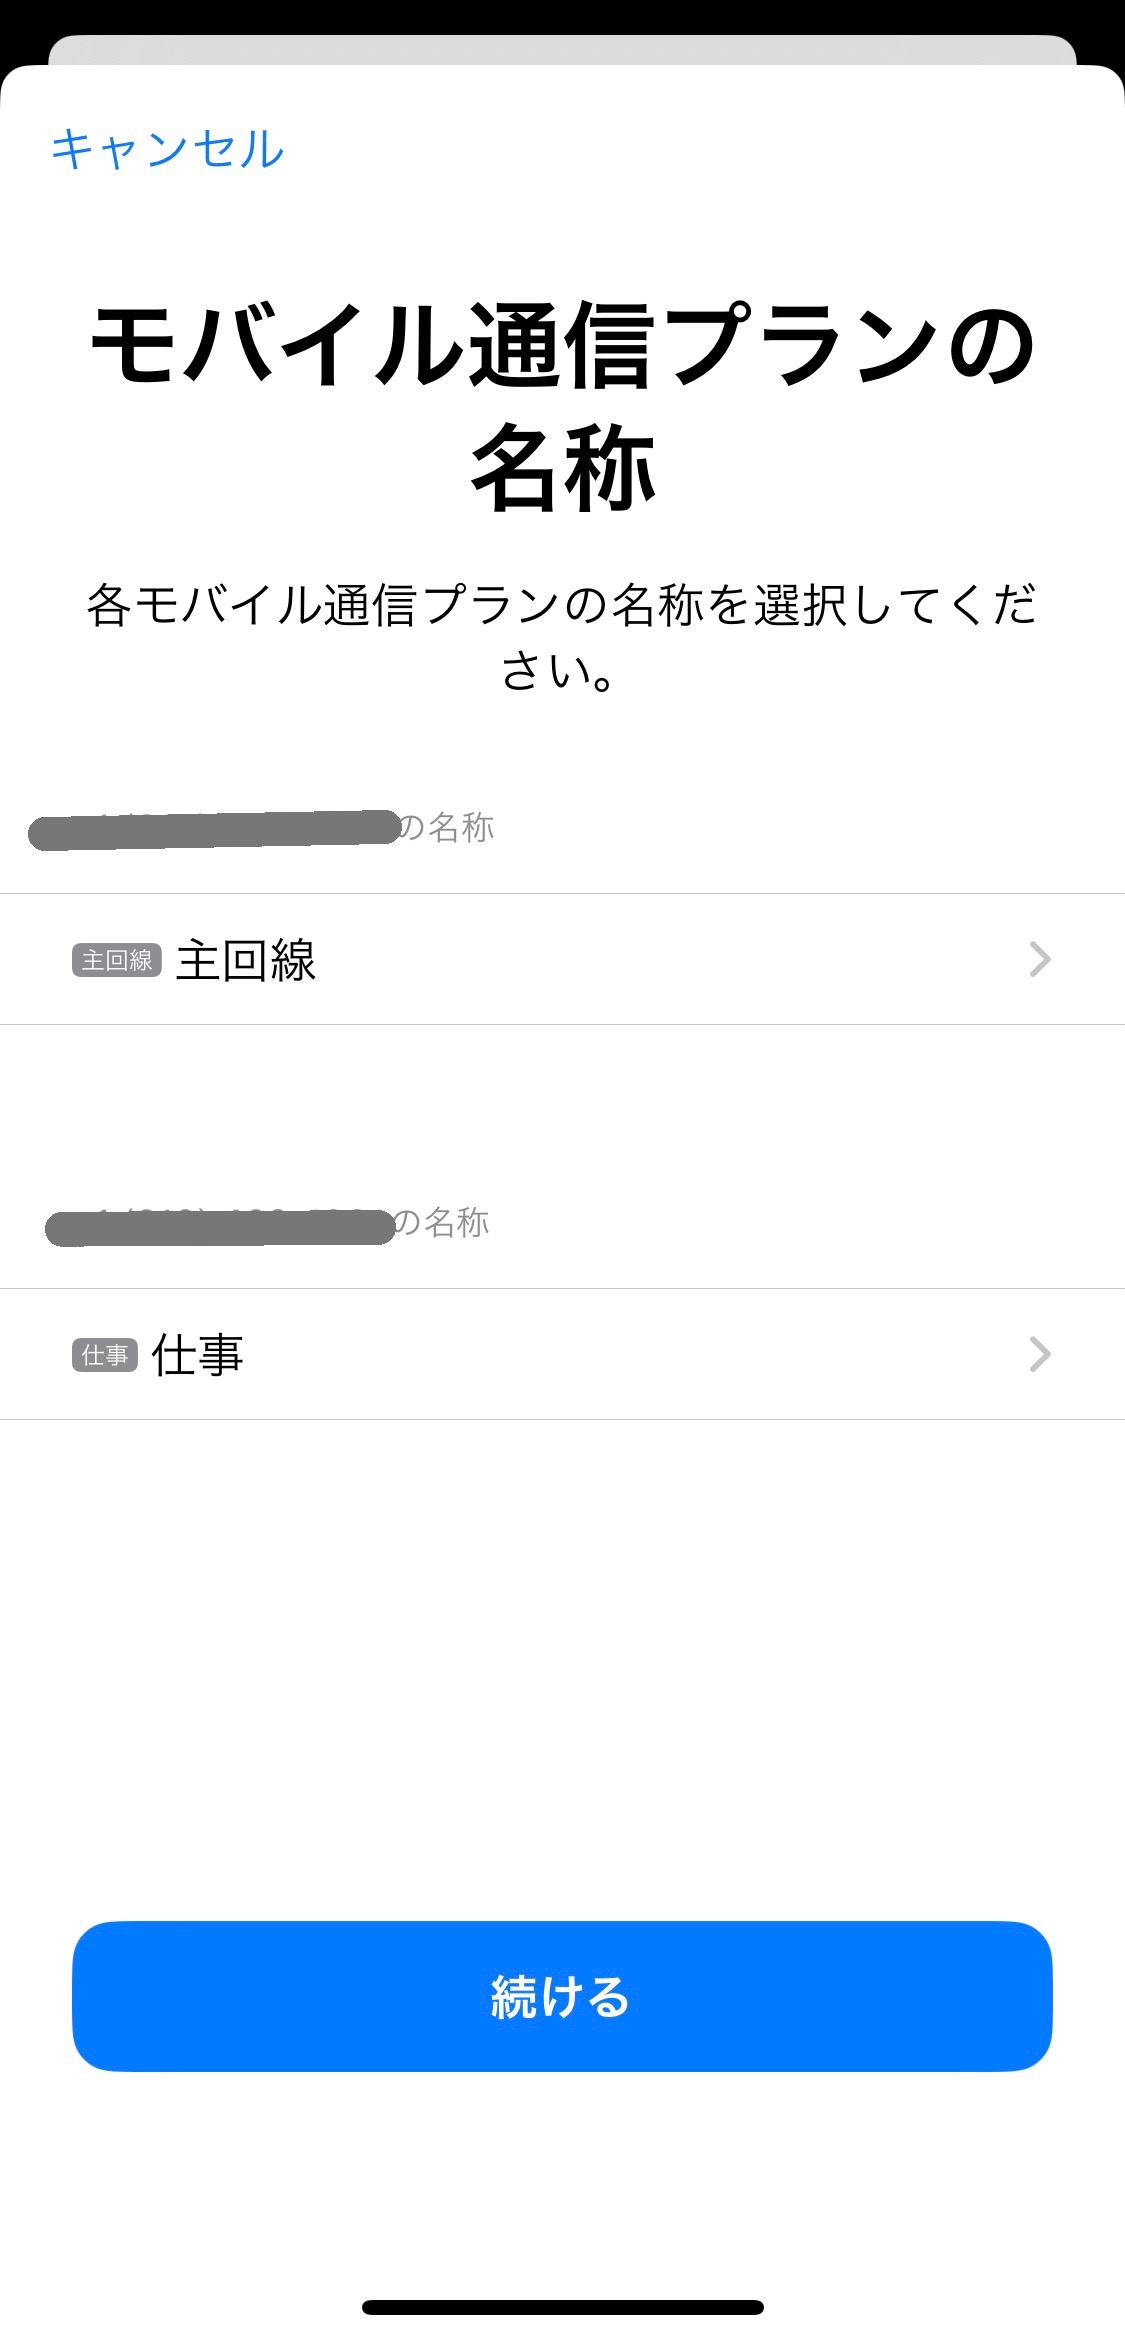
⑥ Set a name for your mobile service plan and tap “Continue.”
⑦ In the “Mobile Service” section of the “Settings” app, make sure that your phone number is displayed under “SIMs.”
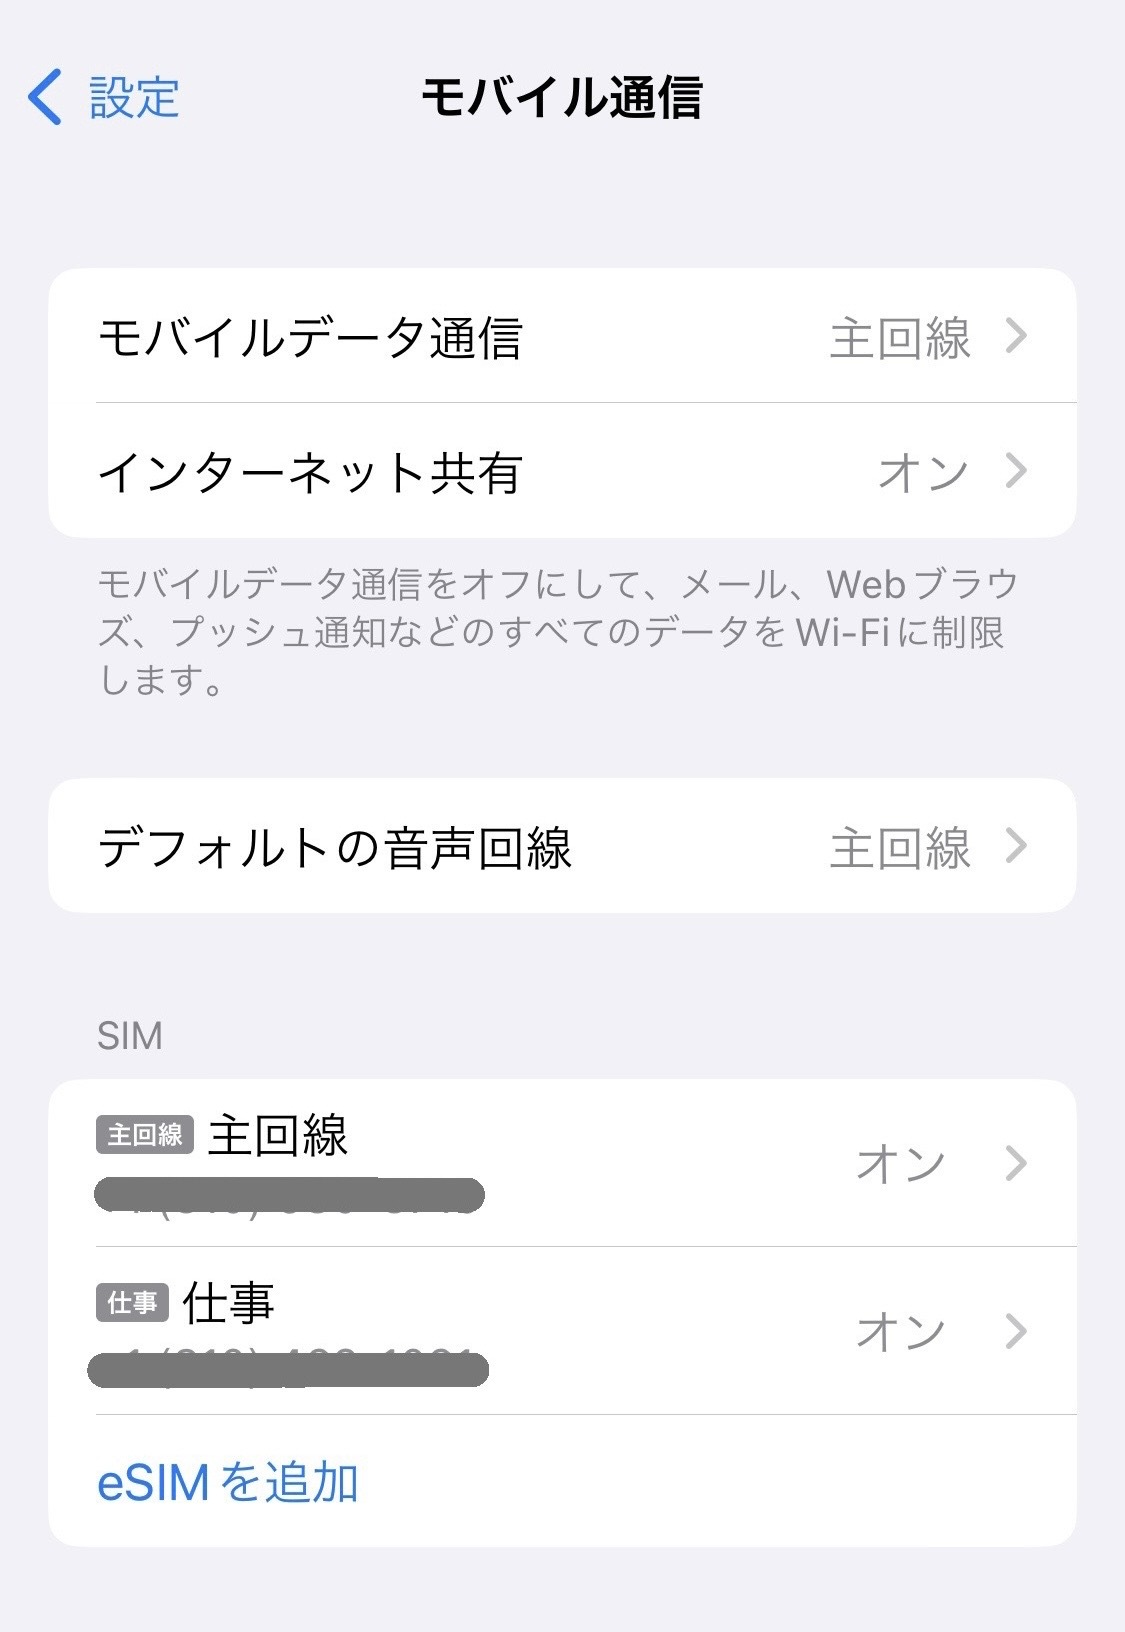
Once you confirm that your device has a cellular signal, the eSIM activation is complete.
=====================
Troubleshooting: If you are unable to add the eSIM
・Try adding the eSIM while connected to Wi-Fi.
・ Check for a carrier settings update and make sure your iPhone is updated to the latest version of iOS.
・ Turn Airplane Mode on for about 30 seconds, then turn it off again.
・ Reset your network settings.
“Settings” → “General” → “Transfer or Reset iPhone” → “Reset” → “Reset Network Settings”
※Please note that resetting your network settings will remove your saved Wi-Fi settings.
・ Turn off any VPN or antivirus/security apps (such as Norton).
Was this article helpful?
Thank you for your feedback!